Sunday, December 30, 2012

A Pocketful of Random

For my friend Andrea, who just learned to do a welt pocket.

Can you find the single welt pocket?


There it is!


The pattern matches at the bottom pocket on the left side only due to the pocket crossing a fitting dart. You have to pick one side or the other.  I wish I had more pictures of how I did this neat trick. It comes down to hunting through the scraps for a piece that matches the motif where the pocket is slashed open, cutting an overly large rectangle and fiddling the welt fold and seam allowances till you get the match. Hand baste, check the match, adjust if necessary. Math and obsessing for the win!

This was a man's vest for a mid-Victorian frock-coated ensemble from Heritage Day 2010 (I think). 

Friday, September 14, 2012

I Need to Meditate, or, The Post in Which I Reveal My Lack Of Center

Another little costuming bonbon with which to avoid the Petticoat of Doom: A dainty little purse!

Whilst neatening up the workshop I came across a purse frame I'd bought some time ago in a burst of enthusiasm after reading a tutorial on vintage style purse construction at the Madam's Mercantile page at BustleDress.com.

I rooted around the scraps box and found a piece of buff colored linen from a lady's motoring duster I made for last year's Rural Heritage Day. I backed it with a piece of woven cotton fusible interfacing for body and cut according to the pattern I'd made following the tutorial. It's lined with the green silk from the latest parasol scraps.


For decoration I decided to embroider. I stink at embroidery. I can execute with variable skill exactly two stitches: Stem, and Lazy Daisy. I recall what I really should be doing, (doom...DOOM!) and press on.


I have legit embroidery floss, but I use that for tailor's tacks in pattern marking. For this project at which I'm doomed (DOOM!) to stunning mediocrity, I used nigh-unmanageable threads frayed from suitably autumnal-colored silk scraps. Pro-tip TalentlessHack-tip: Spit helps tame the threads when they get fuzzy. 

The purse frame I used had the distinction of having been painted with a sort of gold-ish automotive touch-up urethane at one time, but only on one side. I guess I just couldn't spare two more minutes for  the other side and now the gold paint is dried in the little jar. :-/ There are only so many solvent vapors one can inhale before one's fingertips begin to tingle, so to disguise the less than complete removal of the gold I scrubbed in a bit of jewelry making gilders paste. 


I use a toothbrush to scrub it in the crevices.


My purse is quite small, so I added a bottom panel. I like the plumpness. 


So yeah, lack of center:


Perhaps I don't need meditation, just a little measuring. 

Madam's tutorial is fantastic. Without the blight embroidery, this little bag would take maybe three hours to make. Next time I'll use some red velvet that I have in the scraps box. 

Monday, September 10, 2012

The Hat Method of Petticoat Avoidance

The Corded Petticoat of Doom is still out there... Must. Avoid.

Do you know what's just as fun as a parasol? A hat! A cute little pork pie hat.  I designed one last year for my younger daughter, to go with her 1871 girl's dress. 


It turned out so well I immediately drew out the pattern so I wouldn't forget.


Yes, five and thirteen sixteenth inches is strange. I didn't measure when I was using paper to develop the buckram form, I just cut the shape.


Half of the crown side. Two and a half inch segments, five degrees off at each segment to make the curve.

I use buckram I get at Hancock's. Most hat-making references tell you to double up for more stiffness, but I used single layers for this small hat. Wired and whipstitched together:


I use a machine zigzag stitch to wire the buckram and a strong thread to hand whipstitch. You can see the straw I'll use to cover it. I like to use bought hats that I can tear apart. Having the crown tip already shaped in the spiral is so convenient. The hat before I pulled it apart:


I got this one years ago from Hats by Leko, it's the fourth hat on that page. It's alternating straw and grosgrain ribbon. I pulled the stitching so I'd keep a straw and ribbon together. When I got a small enough circle of the crown tip, I started stitching that to the buckram frame.


I used the string I pulled out of the hat to sew it back together. It took some untangling and pressing to straighten out but it's a perfect color match. Hand stitching though heavy stuff like this is pretty tedious but the stitches don't need to be really close. It goes fast. 


I pin it to the frame and hand stitch in rounds.  When I get to the brim it gets trickier. It's a matter of changing the tension of the braid as you sew to get the brim to turn up; loose as I come off the bottom of the brim and tighter as the brim gets wider. 

I rooted through my millinery supplies box for stuff to decorate with and found a feather I'd dyed for a winter fur bonnet that didn't color up enough. Lesson: Keep the mistakes, they may come in handy! I found a piece of red silk in the scraps box to ruche up for a hat band. Also some silk verbascums that I always have on hand. They're my favorite hat flower. One more great thing about tearing apart hats is that you can use the straw braid, or in this case the ribbon as decorative items. 


Here's another hat I made from a similar Leko hat using that concept:


For the lining I used scraps from the green silk parasol. I cut the crown tip and sides from the buckram pattern, adding a three quarter inch seam allowance. I sewed only a quarter inch allowance, leaving the rest for ease in the lining. You may wonder what that white stuff is...


That is a pre-made tailoring sleeve head. It's like quilt batting. I got a sack of them from the tailoring supply house. I tucked it up under the fold before I pinned in the lining to soften the hat where it sits on the head. I pull it over the edge just a little bit as I sew the lining in.


 This style of hat in the 1870s fashion plates is worn very forward on the head and the padding keeps the hat from digging into the forehead and leaving a big red dent. :-O


The finished hat:


The Welcome Distraction Parasol

Even if I didn't need distraction from the corded petticoat of doom, I just love parasols. This new one is made of green silk taffeta gotten majorly on sale at Hancock's. Five bucks a yard! Woot! Like most of my fabric, I bought it because I love it. Didn't really have a purpose for it at the time. Have just now realized it's a spot on match for this fabric combo I got a few years ago:


I definitely feel a dress coming on...

Anyway, on the last parasol post I mentioned that I would try seaming the panels with a serger rolled edge. Not sure that was a great idea. It works as a seam, but without having an absolute thread match I think the seam is so much more visible than a fold-and-stitch seam. You might need to click on the pictures for the larger view to get a better idea of the not quite matching color . 


The original parasol was ivory colored so I painted the handle and ribs brown. The rib tip guards I replaced with my favorite button. I use these little guys in so many ways. The button is plastic, so I can cut them, drill into them, modify them however I need to.  For this application, I cut off the shanks with scissors and drilled a tiny hole just a bit bigger than the rib end. 


You can better see what I mean about the serger thread color here as well.

Then I used the same small drill bit to make a hole across the width of the button so I could sew it to the parasol cover. 


Once the button tips are all sewn onto the cover, the tips slide onto the ribs.


I used a different button to decorate the handle bottom this time. 


The finished parasol has a knife pleated ruffle and bias band trim. 


Ah. I feel better now. :o)

My First (possibly last) Corded Petticoat

Rural Heritage Day 2012 is just around the corner! The dress demonstration for this year has our tourism director Stephanie changing from an 1845 dress to an 1865 dress. The hoop and petticoat for the '65 dress is done, now onto the petticoats for the '45 dress.

The first skirt layer for a pre-hoop era dress is a corded petticoat. Once starched, the cords are quite stiff. In addition to supporting the next layers of ruffled petticoats, the corded petti keeps all the layers of fabric from wrapping around the legs.

The concept is quite simple, two layers of fabric with cords in between. The fabric I'm using is some lightweight muslin.  I used a 90 inch length of 45 inch wide muslin, folded. That allows for about 21 inches of corded length. The corded piece will be sewn to a yoke that has a drawstring or waistband.

The cording is Sugar and Cream cotton yarn.


I was worried about the cotton yarn shrinking in the petticoat, so I boiled the whole skein of yarn for a few minutes. To dry it, I unwound a few yards at a time and put the skein and the unwound yarn on the drying rack that inserts into my dryer. When the unwound yarn was dry I balled that up and unwound more. Repeat for the whole skein.

Many costumers around the 'nets make their corded pettis by sandwiching the cords between the layers and using a zipper foot to sew the cords into channels as they go. I tried it this way two times and got frustrated both times. I hate being frustrated, it makes me crave expensive cheese. Knowing how much time was going into this, I devised a new strategy to limit frustration: Sew channels first, and fill them afterwards.


At first I was using a blunt tapestry needle to draw the cords through, but researching the interwebs I found a quilter's page where she was using a long trapunto needle to fill her quilt. I set out in search of one of these long blunt needles and struck out. I did find find doll needles though, long, strong and sharp. The sharp was easy to deal with. A few seconds on the grinding stone and a buff with superfine sandpaper and I had a four inch blunt needle. Huzzah!


Ninety inches of straight stitching row after row is mind numbing. I switch between stitching and filling to keep from going nutz.


You can see the cord tails all over the place. Intrepid costumers who have gone before me advise to be sure the cords don't all end in the same place or the petticoat will buckle right there. 

This project is INCREDIBLY time consuming. I keep my iPhone nearby for photographing the progress and for entertainment. (All praise to the iPhone Netflix app.) I've prepared a graphic to illustrate what I mean by time consuming:


The top row of unfilled stitching is just about the halfway mark. My sanity is hanging by a thread. (nyuk!) I have to do something else for a while. This means of course....Parasol!!


Monday, August 6, 2012

A Quickie!

Sometimes I need a little project for a quick hit of accomplishment. Ergo, parasol! Sunshades are essential for the Victorian lady and quite easy for the costumer. I did this one in about five hours, and about half that time was decoration.

Little costume parasols are available and quite economical at the Costumes of Nashua website. I get the thirteen dollar,  28.5 inch nylon parasol, usually a few each in black and white.

Stephanie of Ste. Genevieve Rural Heritage Day currently has a plain black parasol, straight from Costumes of Nashua, and this one is intended as an upgrade. Happy early RHD Stephanie!

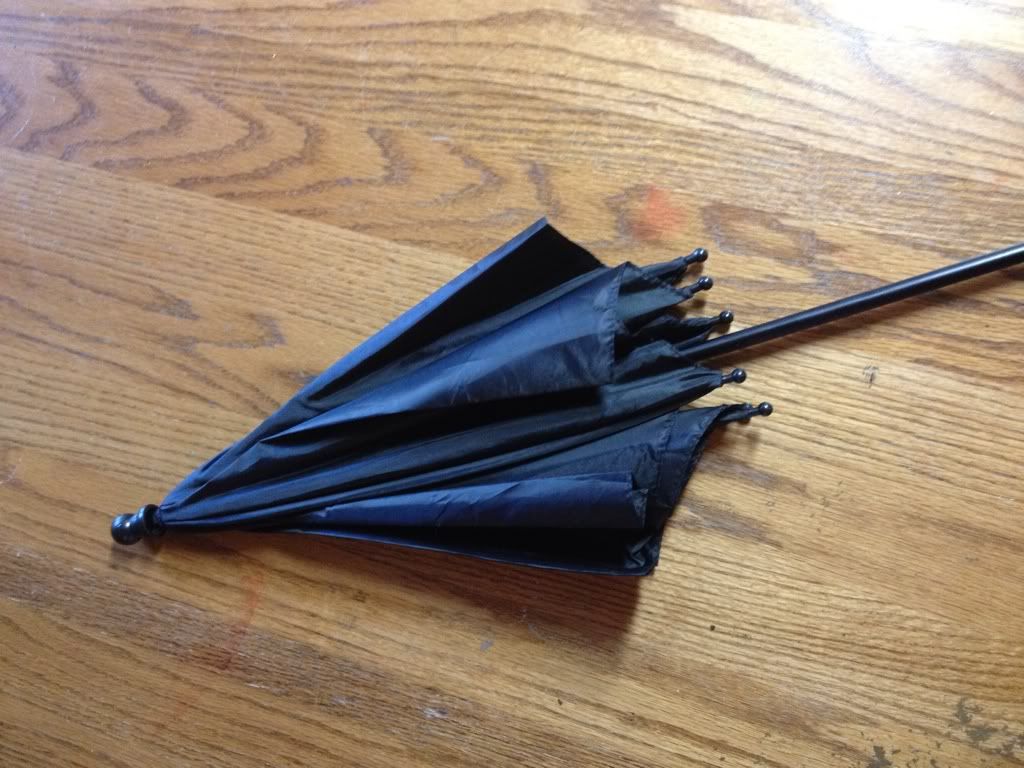
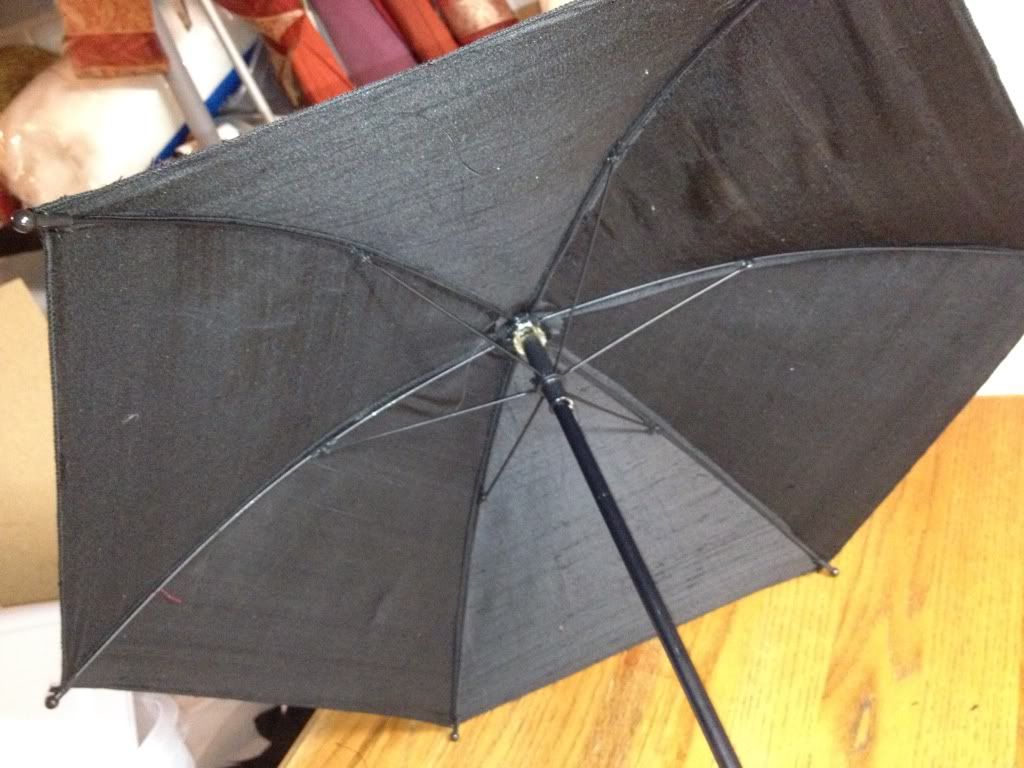
We start with a plain parasol:


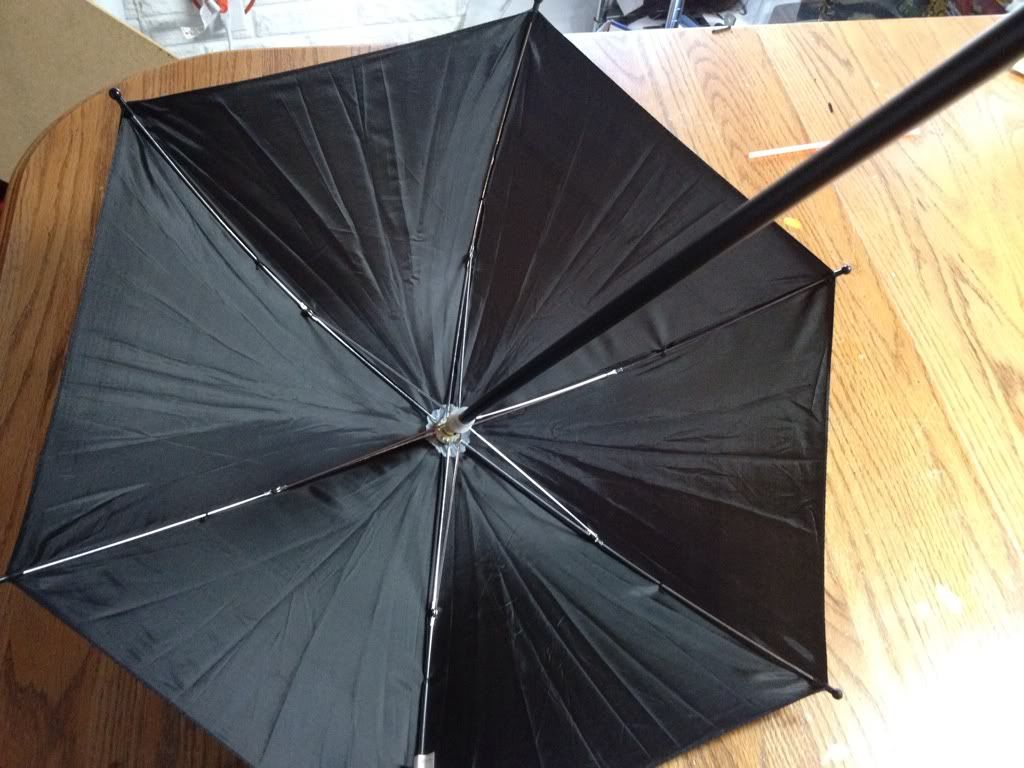
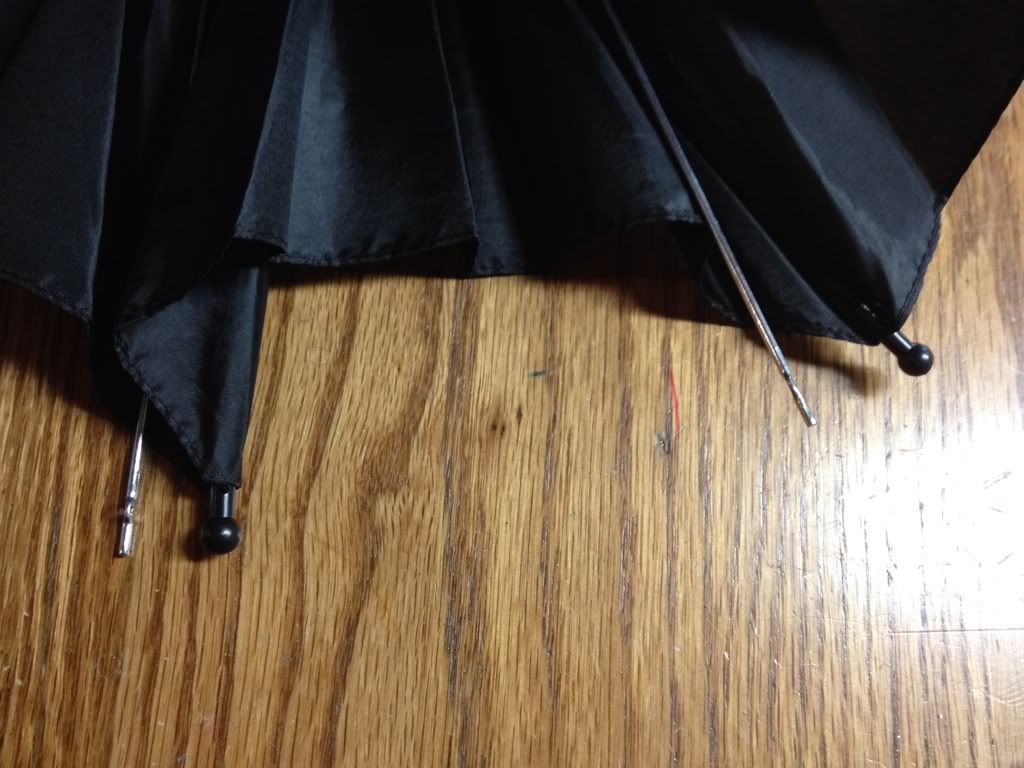
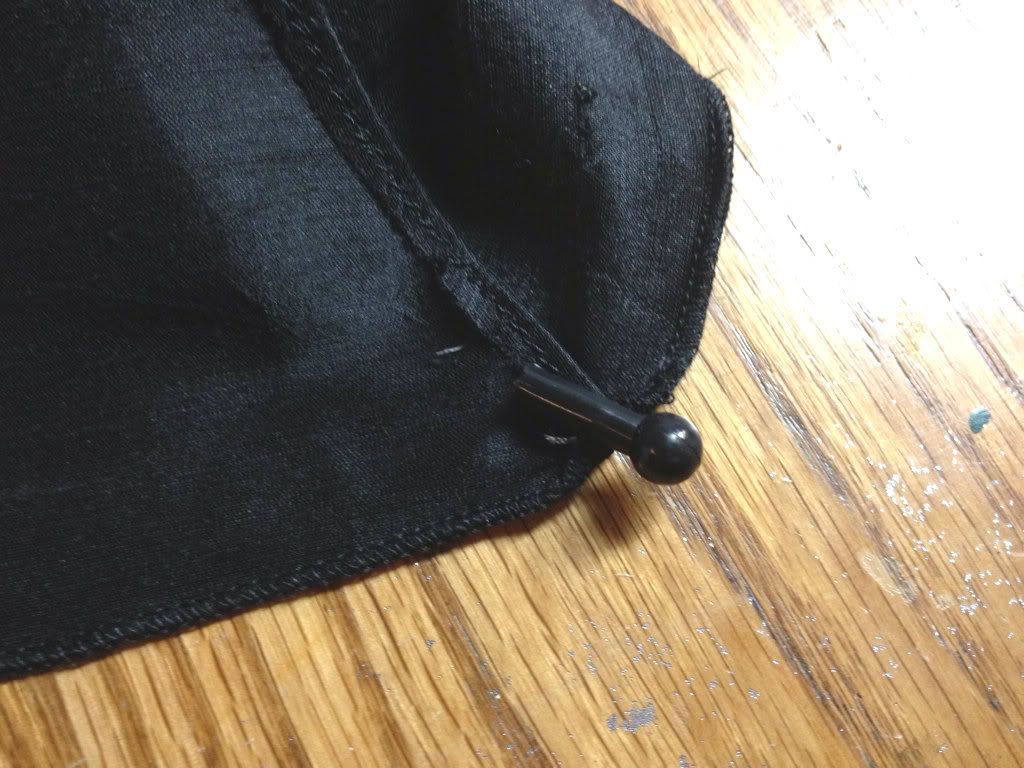
Now take it apart. A pair of pliers and a small thin screwdriver will be necessary. The rib tips just slide off. 


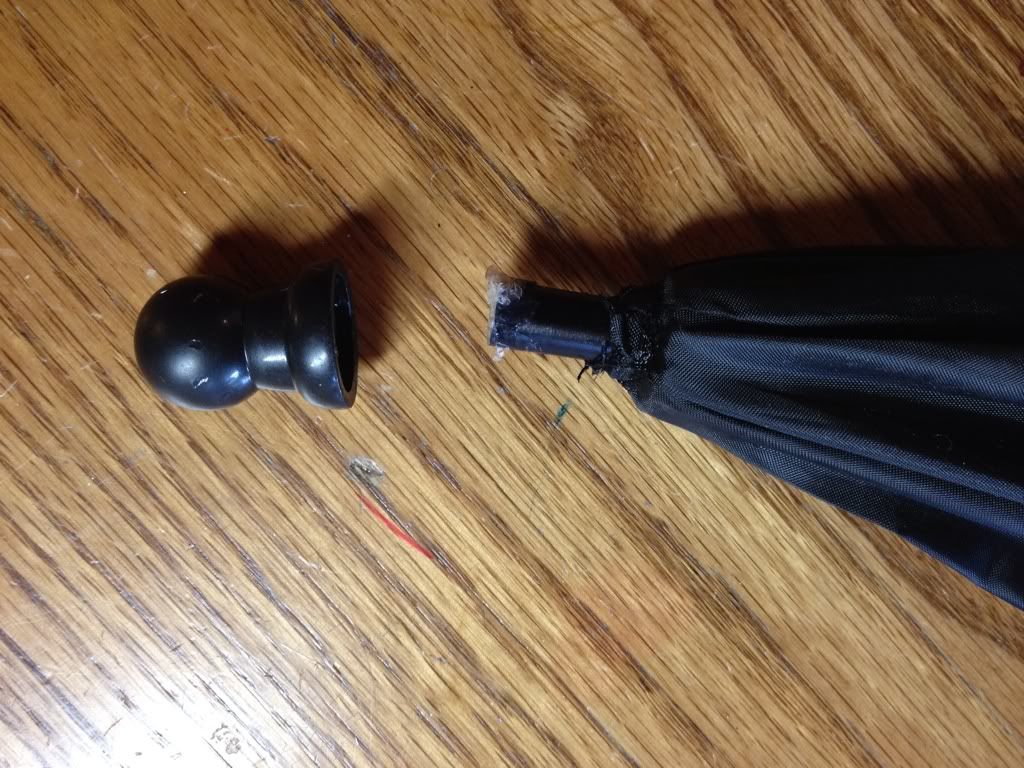
The finial is generally glued on. If it doesn't come off easily, a thirty second dip in a cup of boiled water melts the glue and it'll slide right off. This one came off relatively easily. 


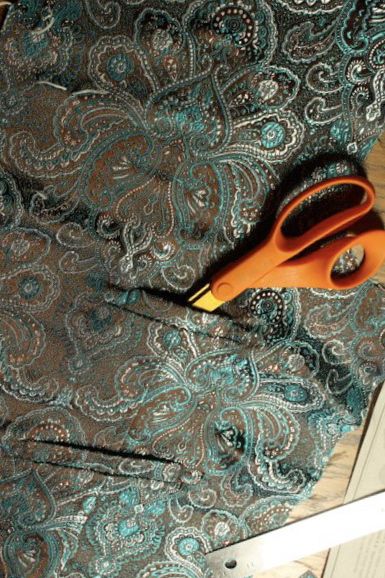
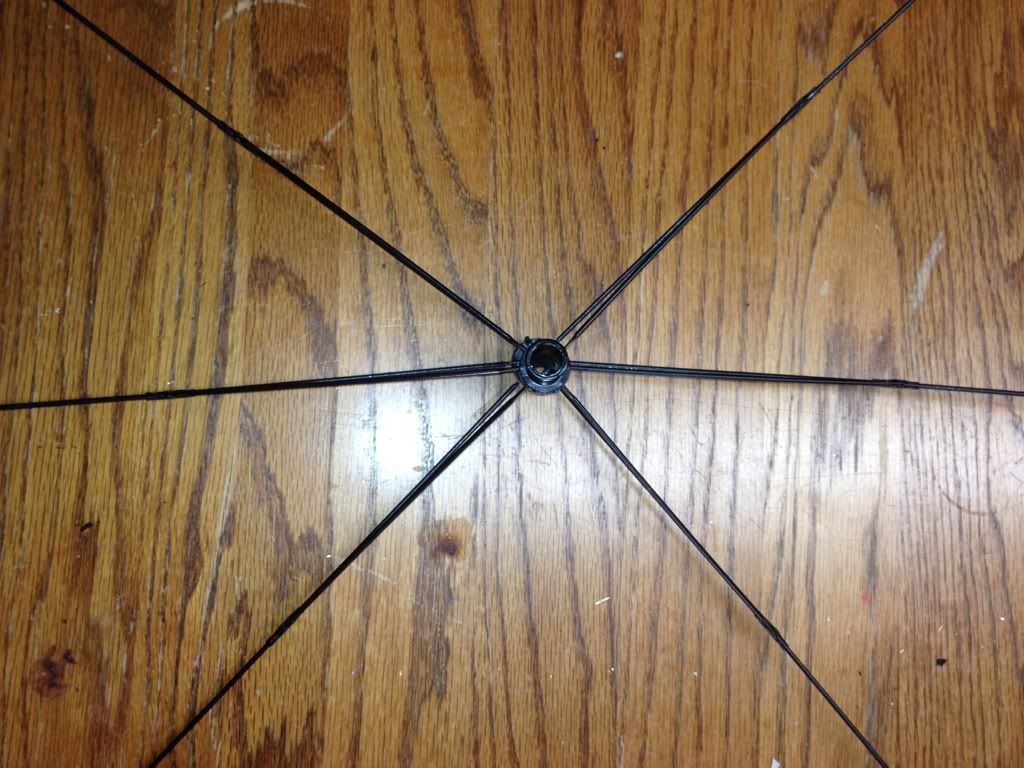
A few quick snips release the cover from the ribs...


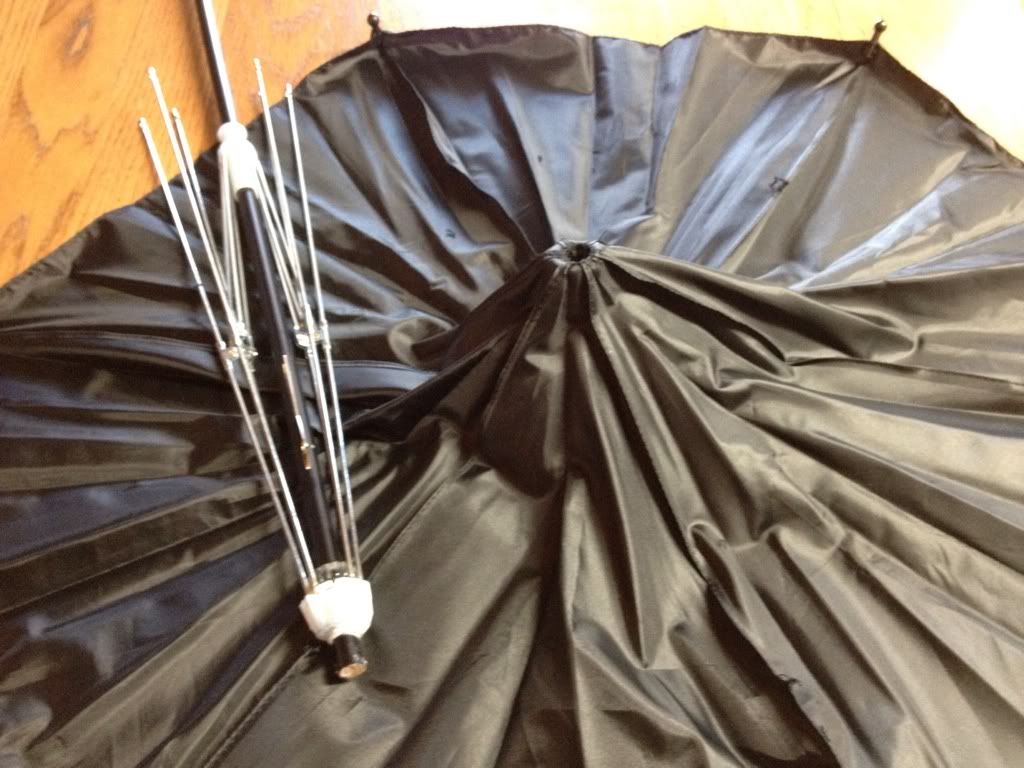
...And the whole cover lifts right off. 


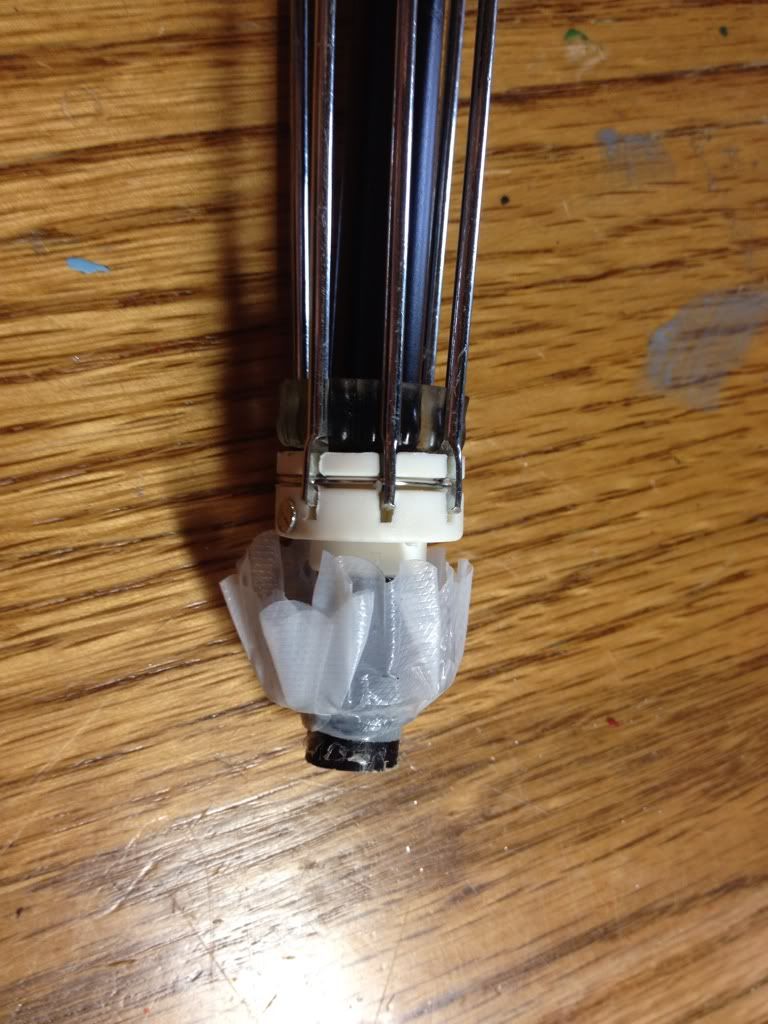
There is a thin plastic cover that fits over the hinge ends of the ribs to keep the fabric from getting caught. Save that for later.


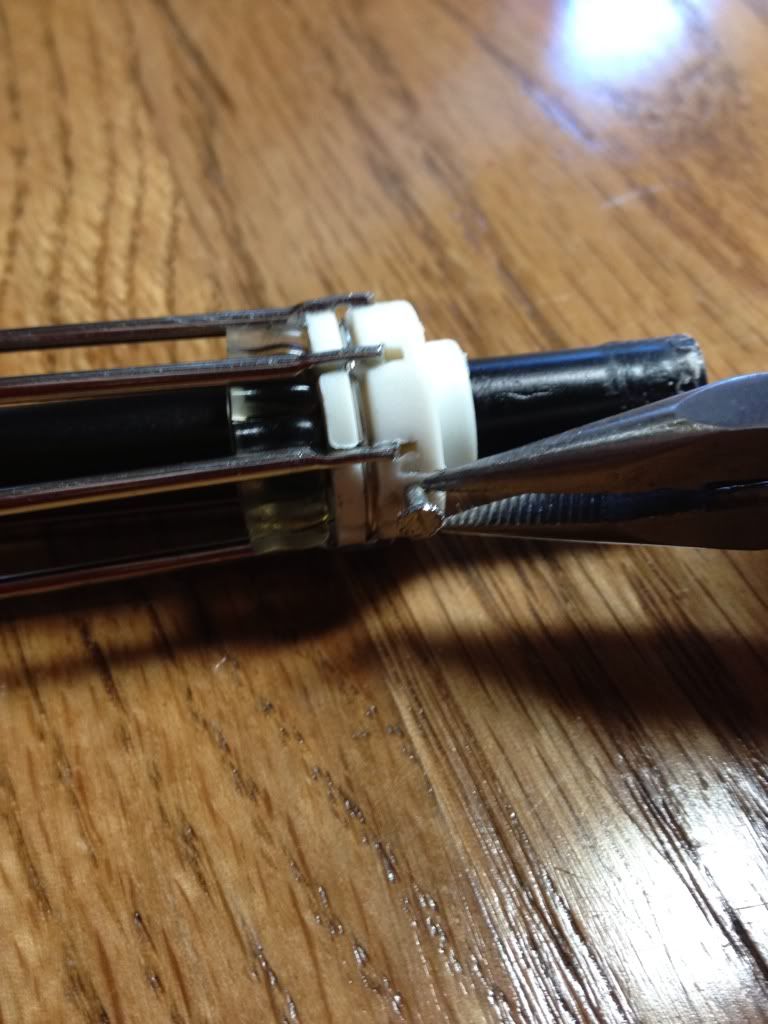
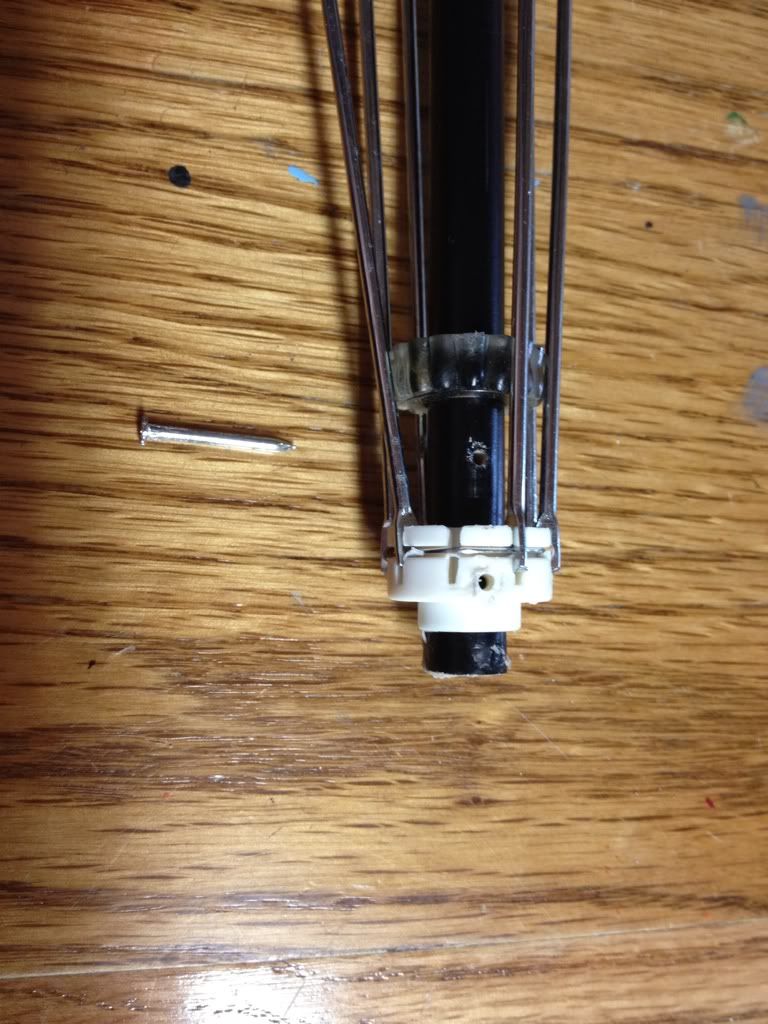
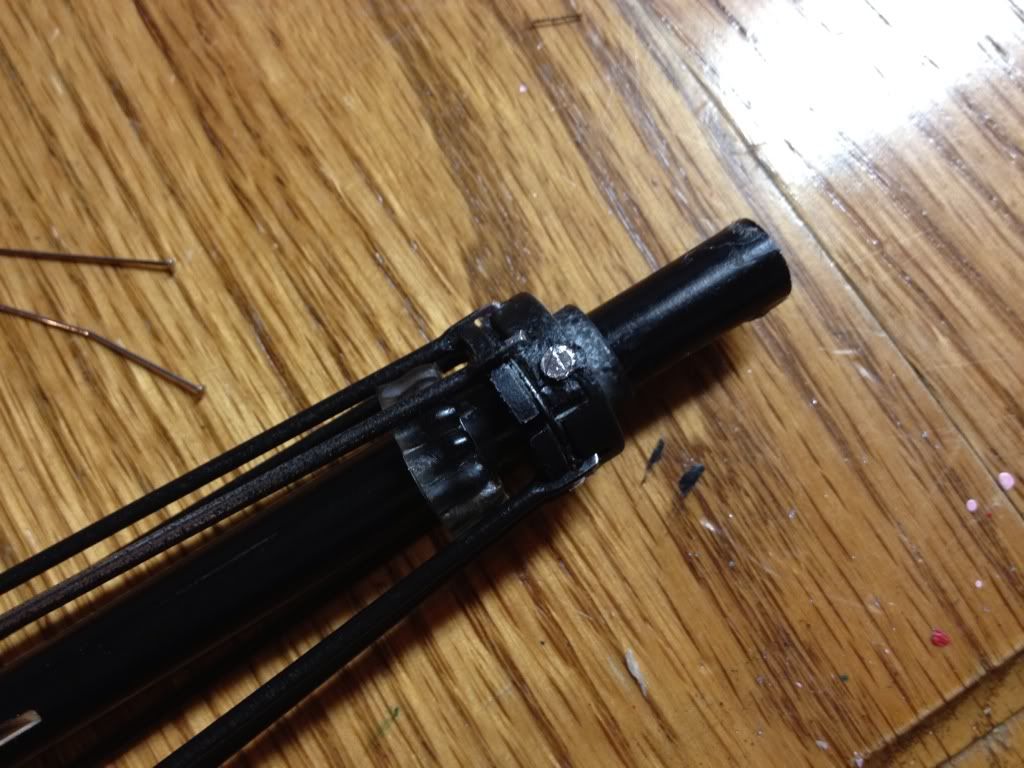
This is the hard part. That nail is what holds the parasol mechanism in place and it's sometimes a pain to get out. This was one of those times. I used the screwdriver to dig and pry under the edge of the screw. Eventually, I got it out enough to grab it with the pliers and wiggle it out the rest of the way.


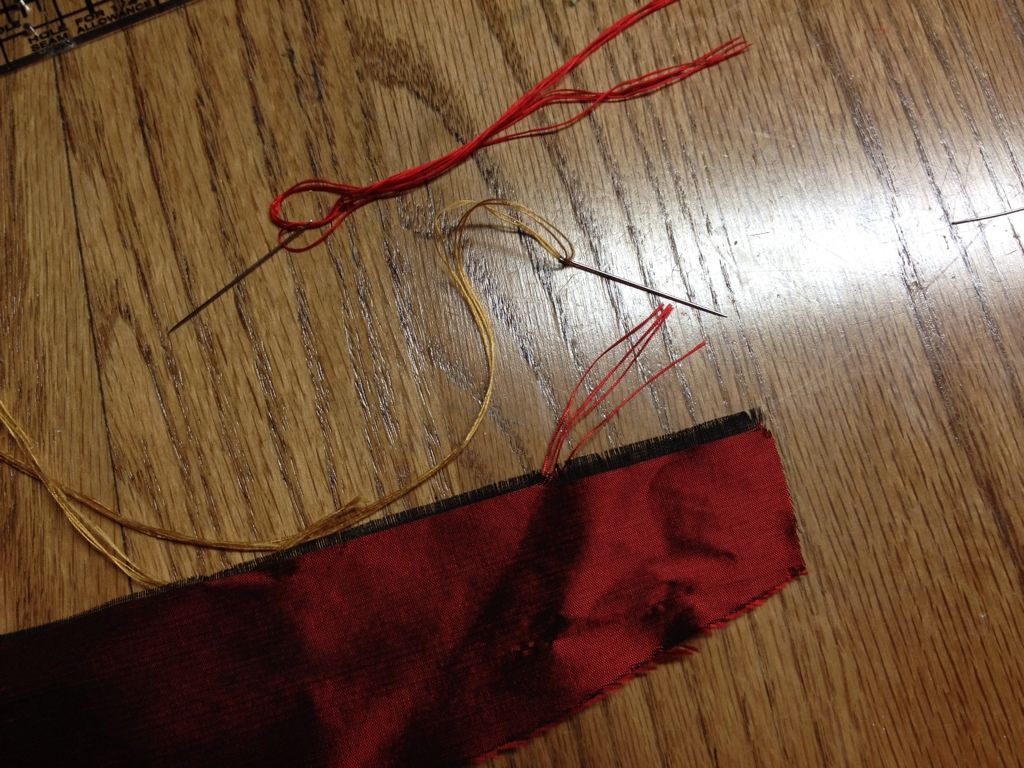
Now rip the stitching out of the old cover to get one of the triangles that make up the whole cover. Make a note of the seam allowances. 


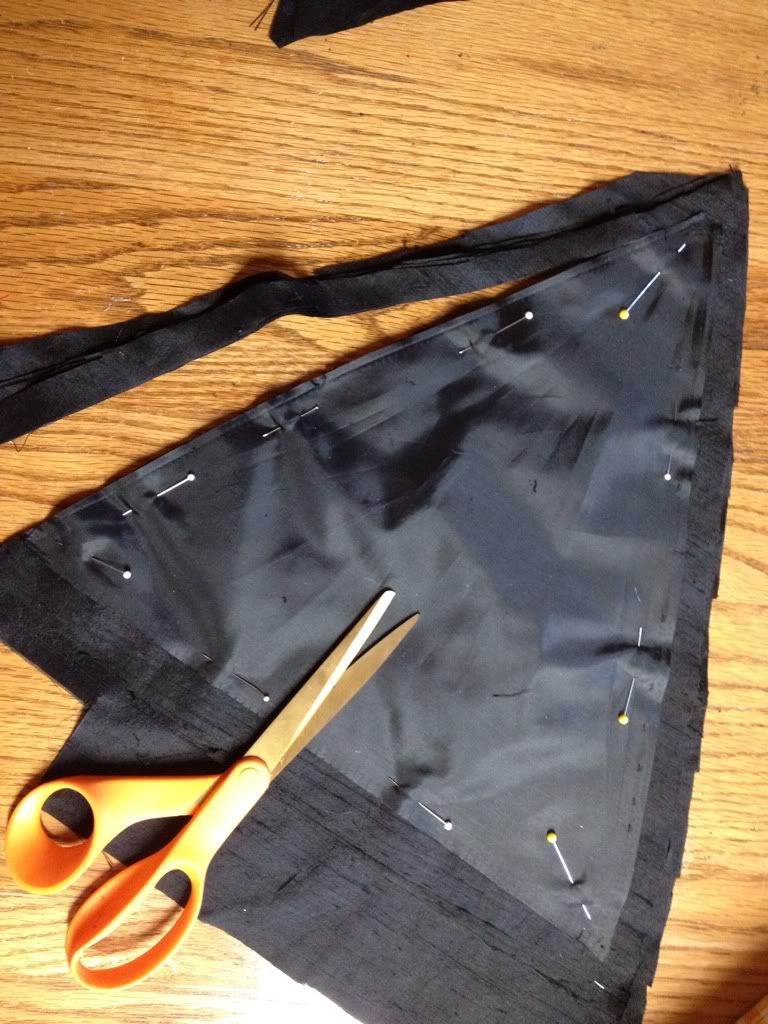
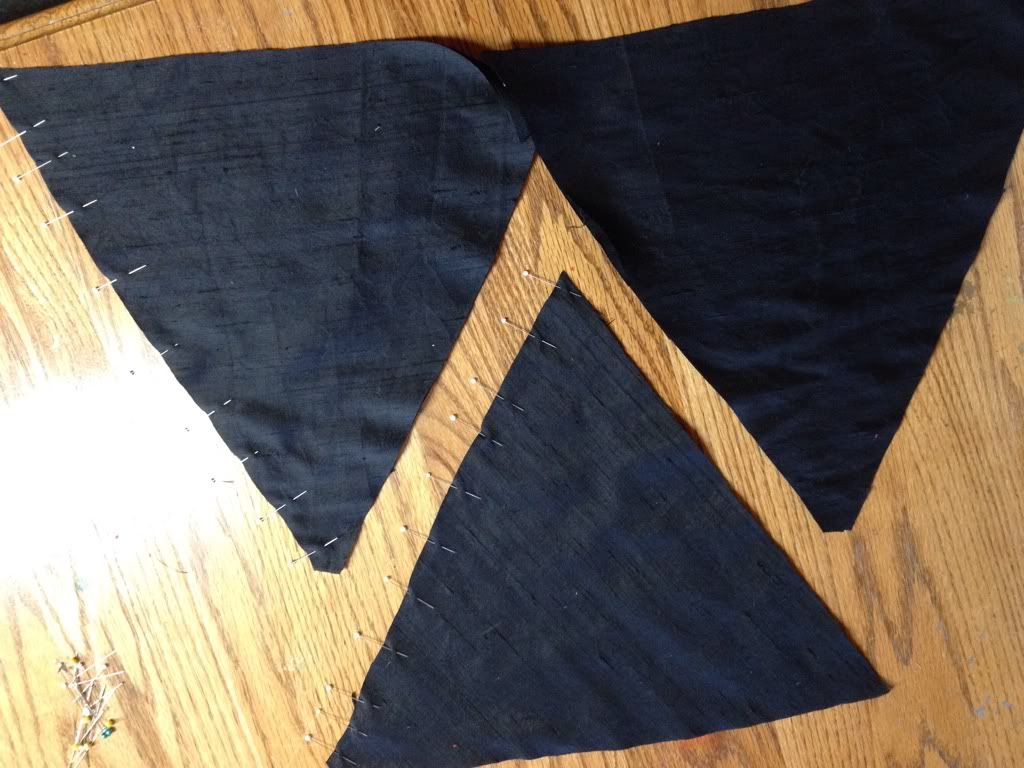
Press the pattern piece and use that to cut six new cover pieces. I'm using silk dupioni scraps from a previous project. It's important to make sure the straight grain of the fabric runs from the point at the center of the cover to the middle of the outside edge of the cover piece. This will put the edges over the parasol ribs underneath fabric cut on the bias. This gives the fabric a little stretch where the ribs come up.  


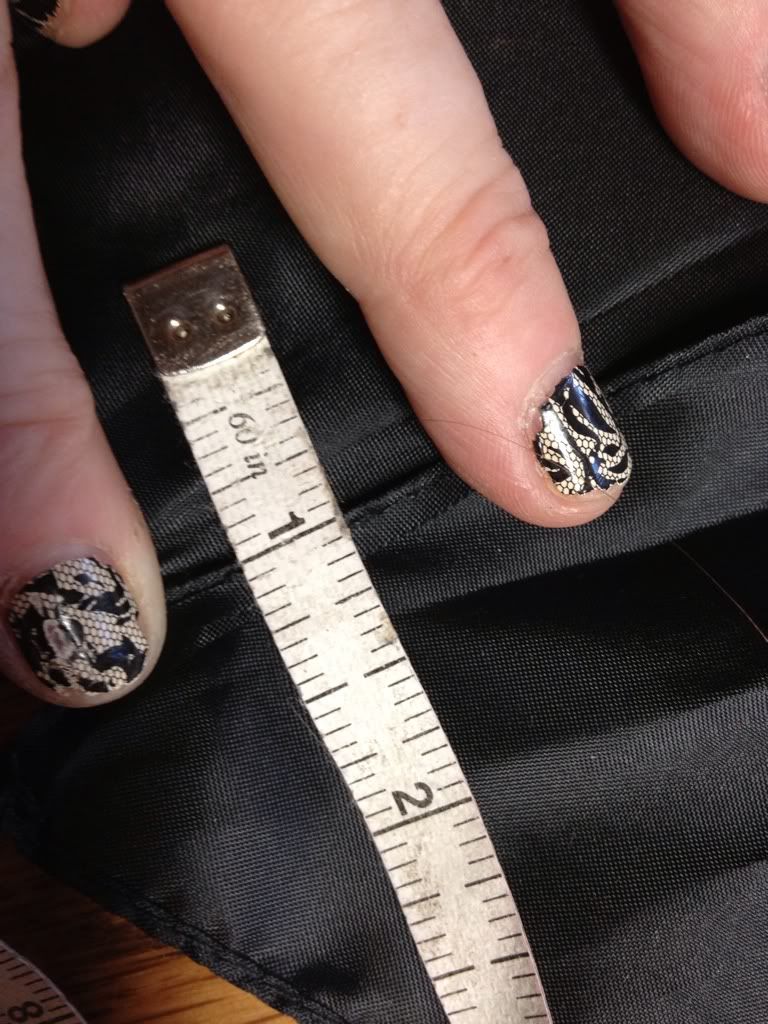
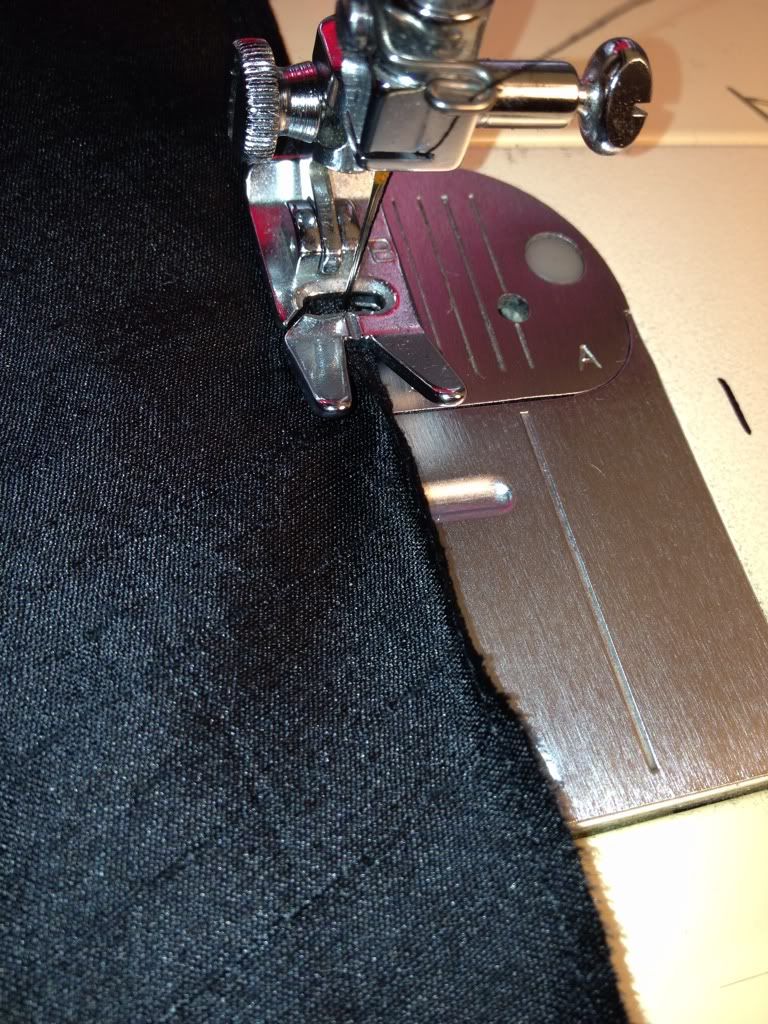
Sew the triangles together with the same seam allowance as the original. In this case it's one eighth of an inch. 


The original cover had the pieces laid together, folder over and stitched once. It's hard to see here but I sewed the pieces together flat with a scant one-eighth allowance and then folded the edge over  and sewed again. I think the next parasol I do I'll do this step as a rolled hem on the serger. 


The silver toned ribs weren't horrible, but the white slider was, so I hit it with a little black spray paint. If I was doing another color for the handle I'd sand and spray the whole structure.


Hard to see in this shot but I hemmed the outside edge with a rolled hem on the serger. If I was going to make a plain cover I'd do a narrow stitched hem, but this edge will be covered with decorations. The rib tips are replaced at this time.


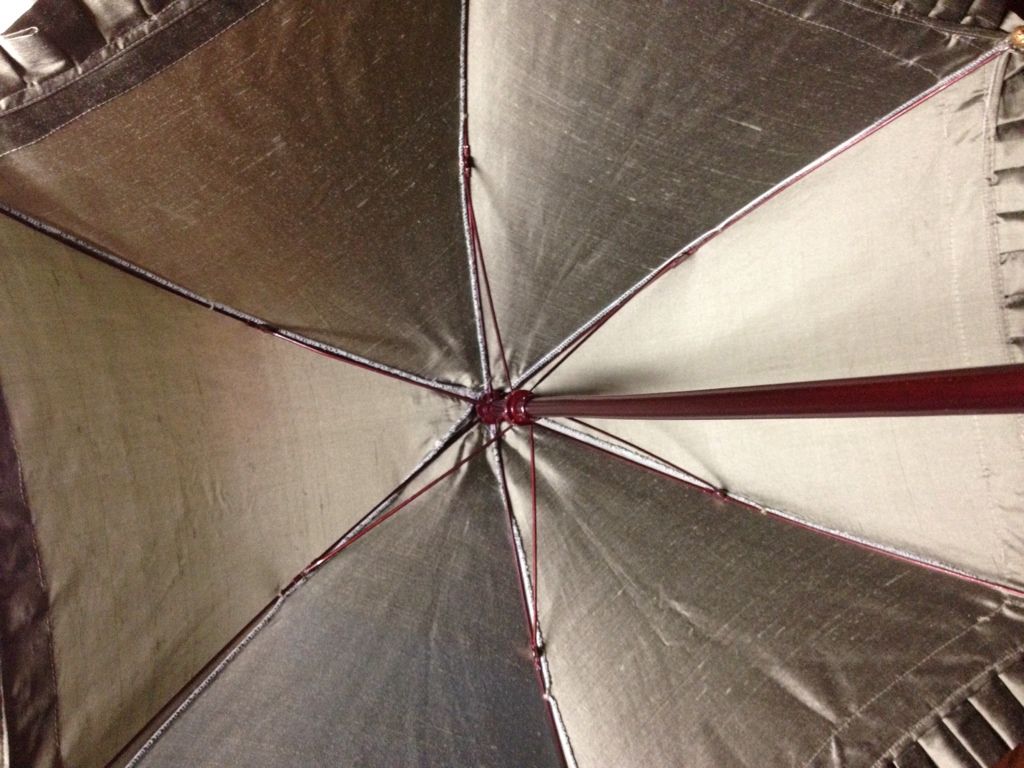
The ribs are dry and the parasol gets re-assembled. The nail goes right back into the original hole. 


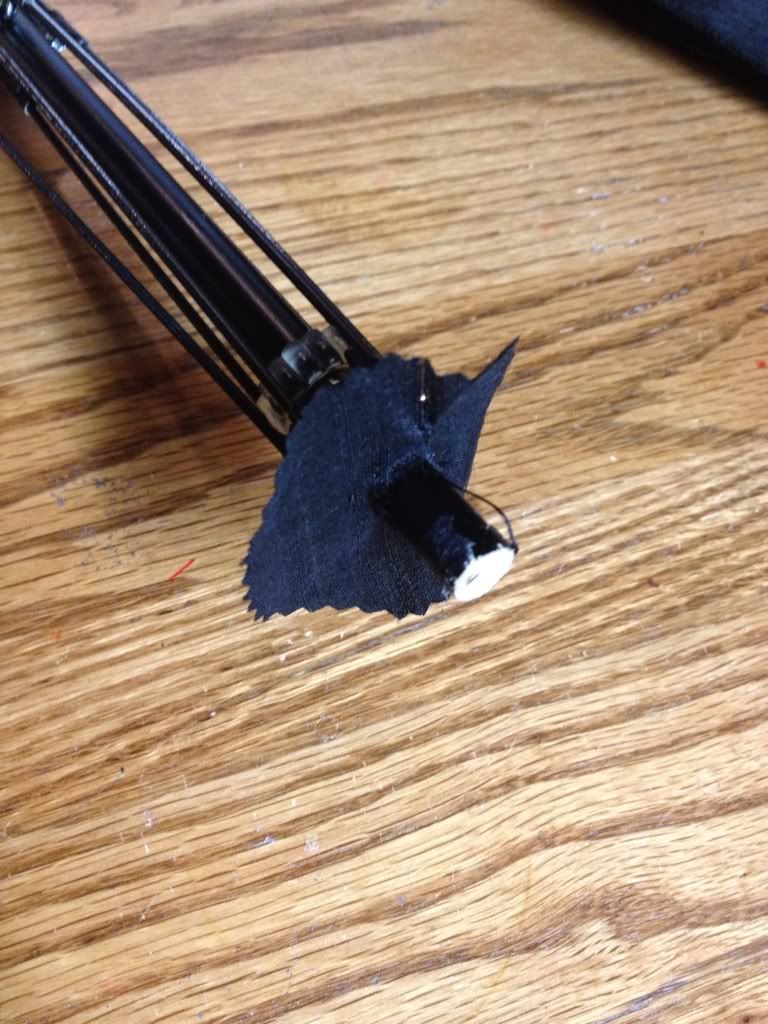
The white plastic fabric guard has to go! I pinked a circle of black silk to go in its place.


 A few snips opens a hole for it to slide onto the handle. 


The cover slides back over the handle and the rib tips slide back into place.


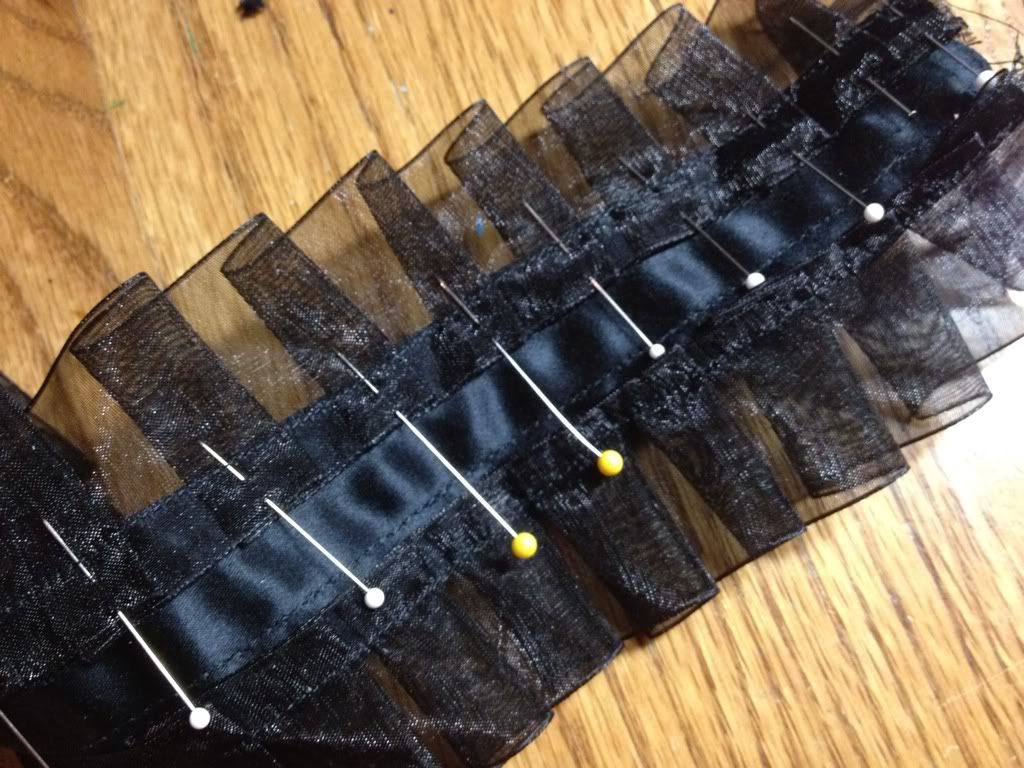
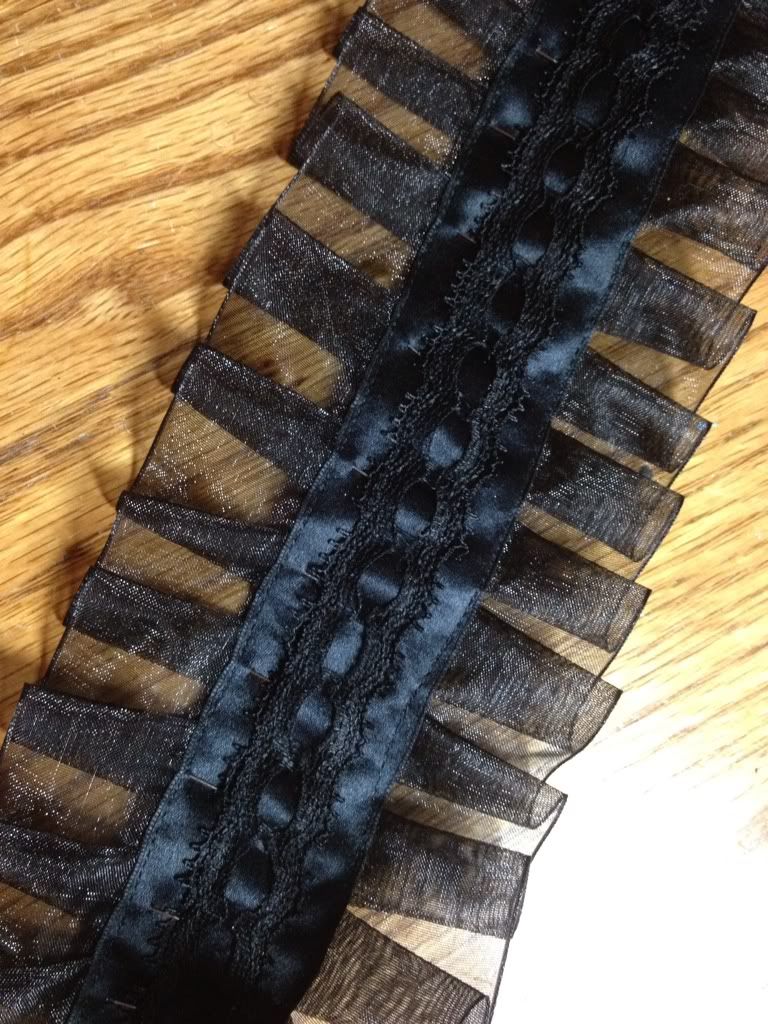
Now it's Fun Time!! Black silk ribbon about 1.5 inches wide, edged with black organdy ribbon. I think the pleats took the longest of any step. Music helps with the boredom of pleats. There is only one playlist for a black on black project. Johnny Cash. 


The black beading lace went on before the pleats.


The trim piece was applied while the parasol was open to be sure not to make the cover too tight. Dupioni hides stitches quite nicely on the inside and all layers of the decoration make for lots of places to hide hand stitches.


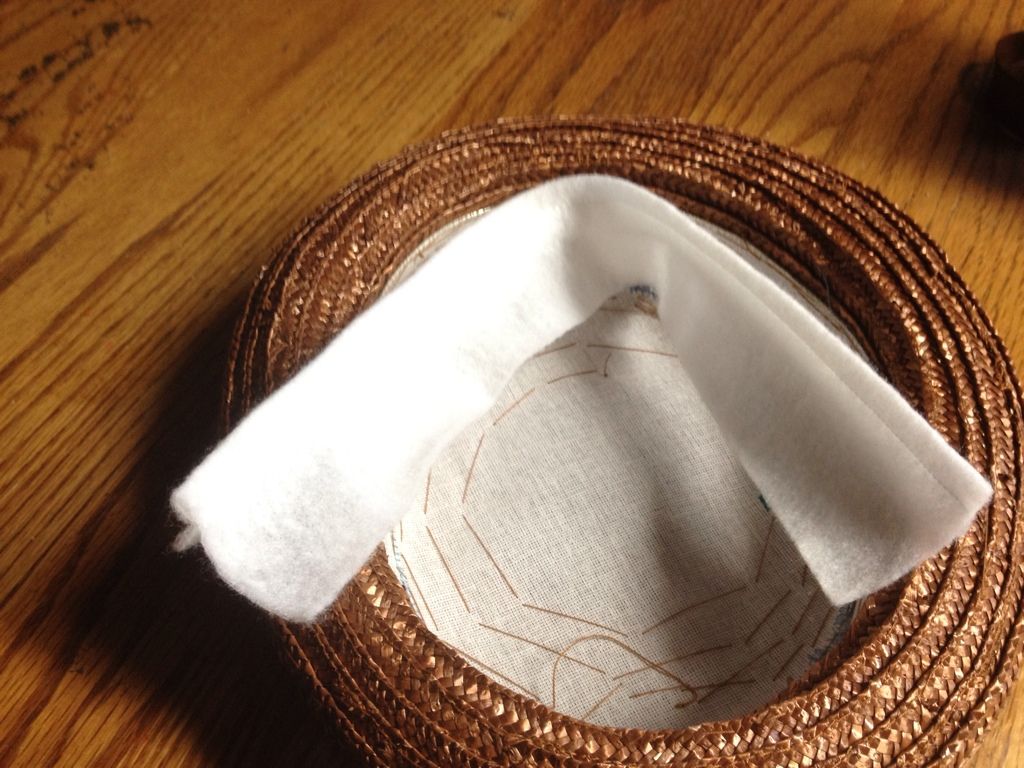
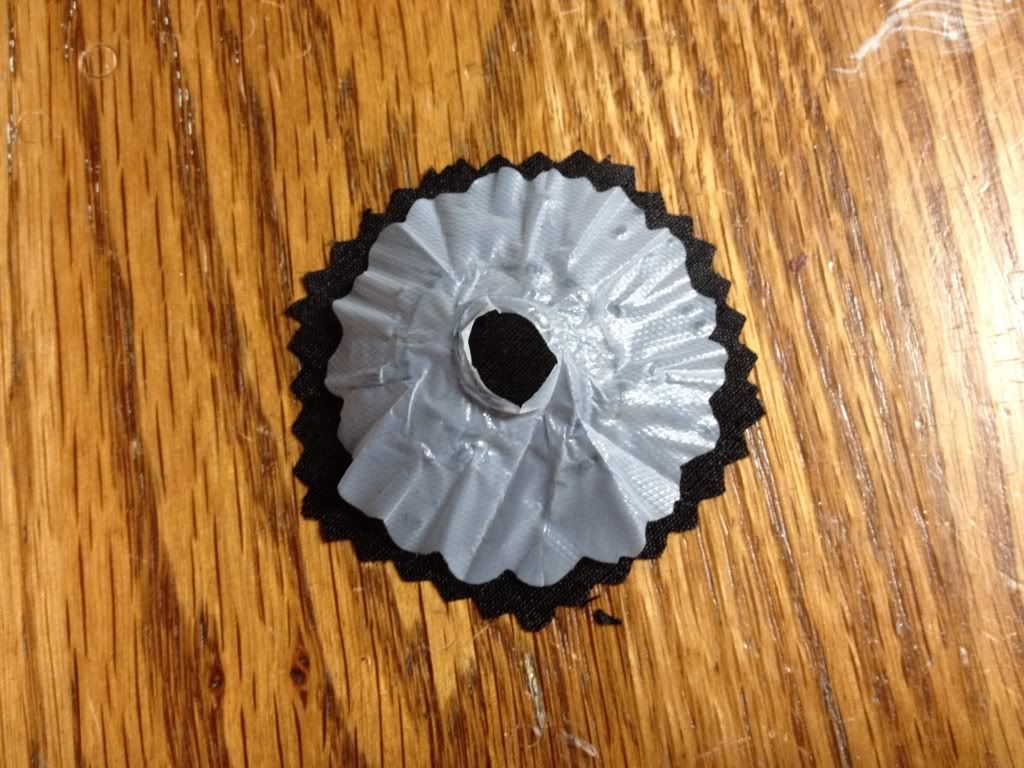
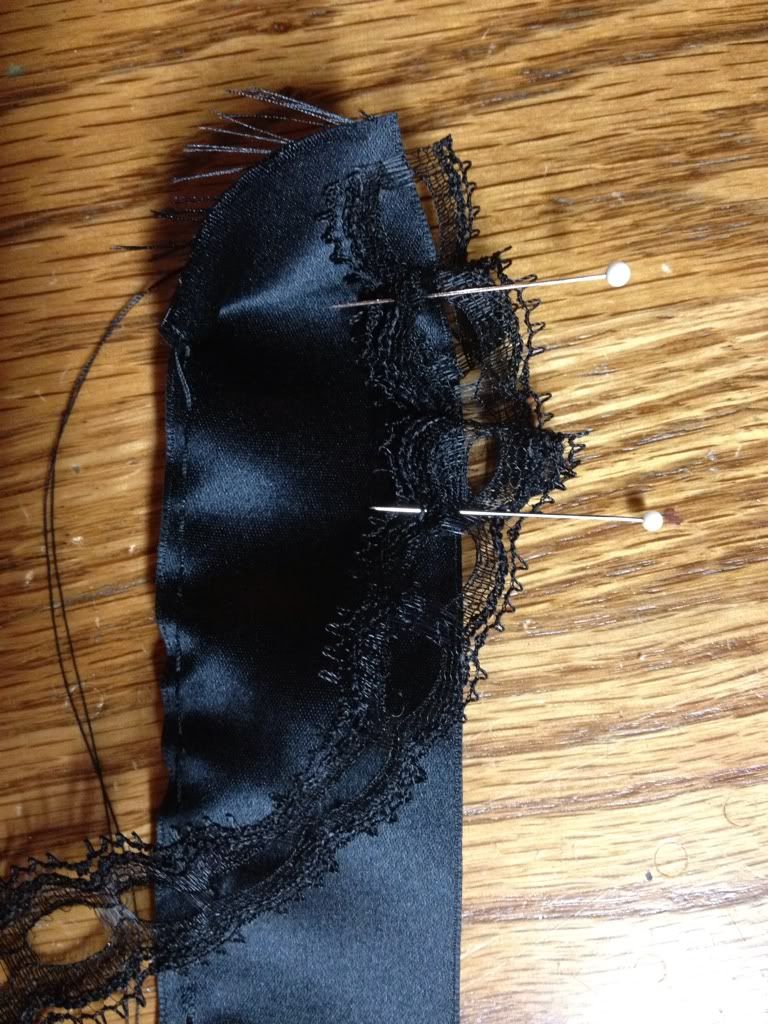
The top needs a little decoration too. More of the wide silk ribbon and more of the beading lace. The edge gets gathered to make a ruffly circle to slide over the top.


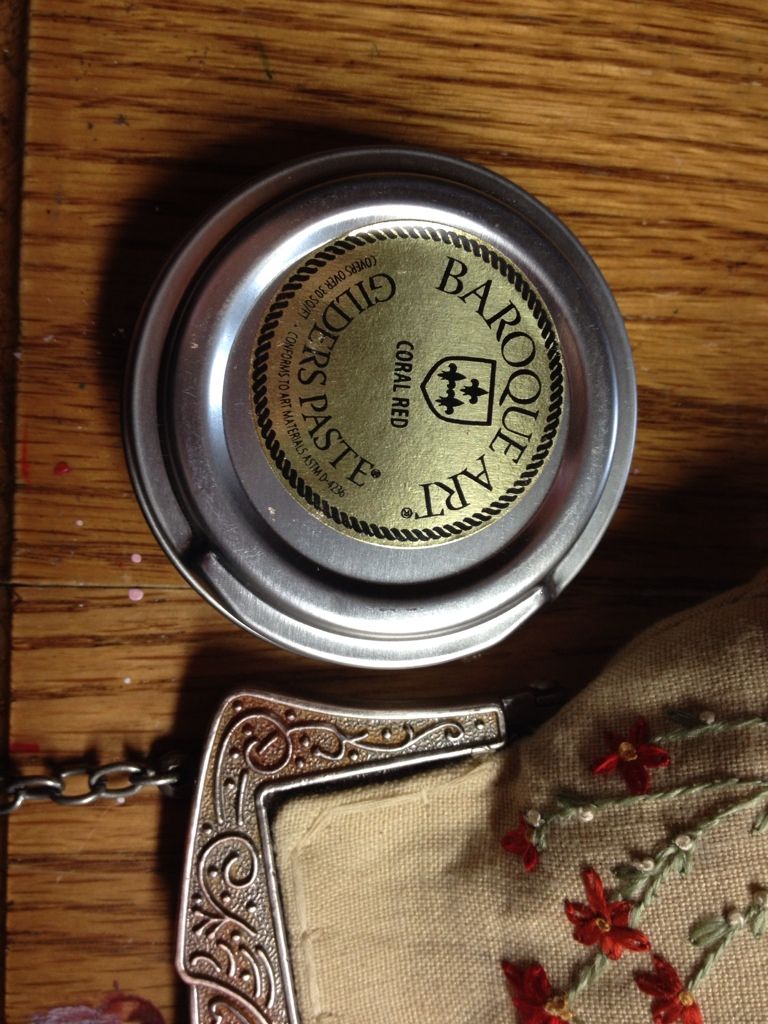
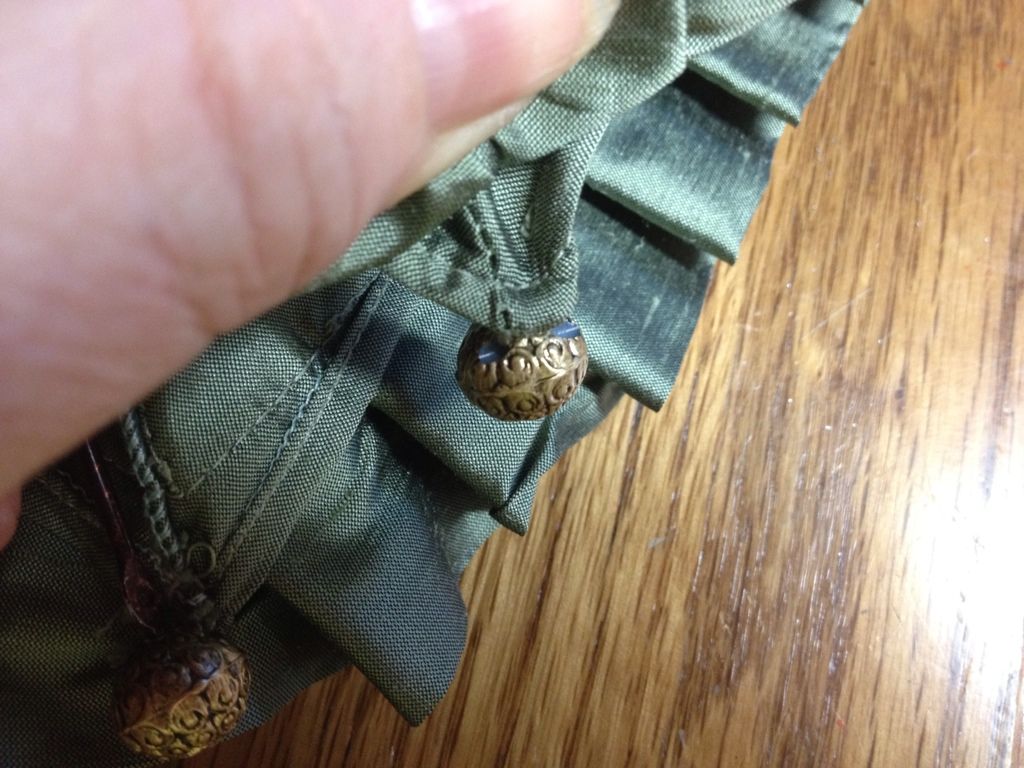
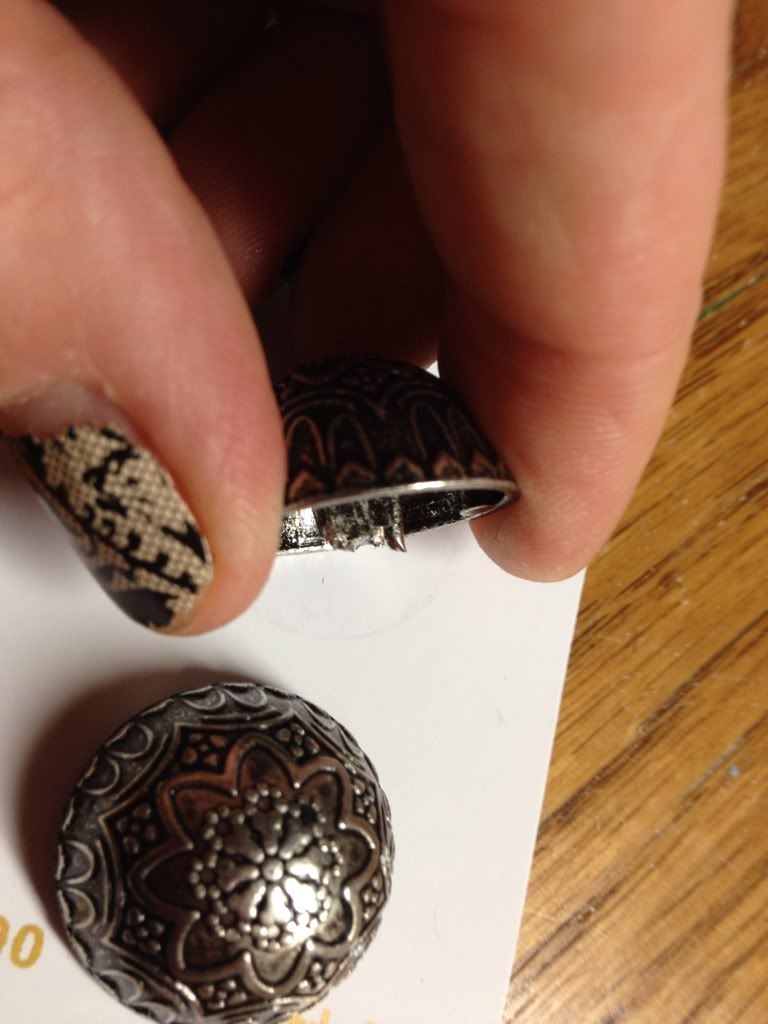
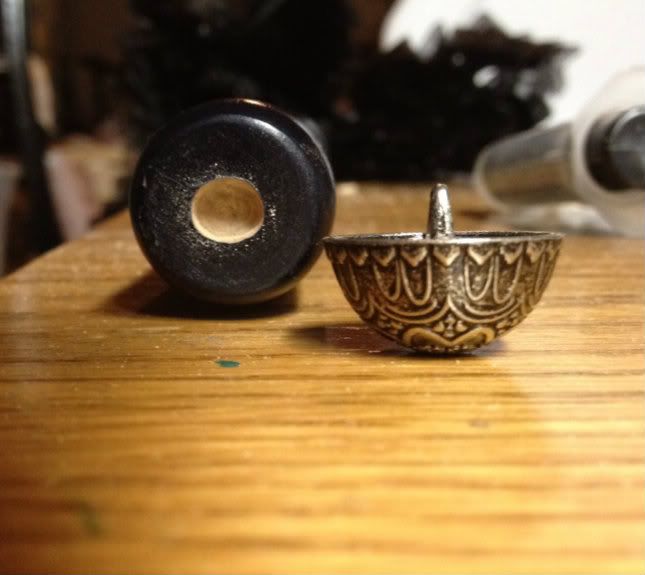
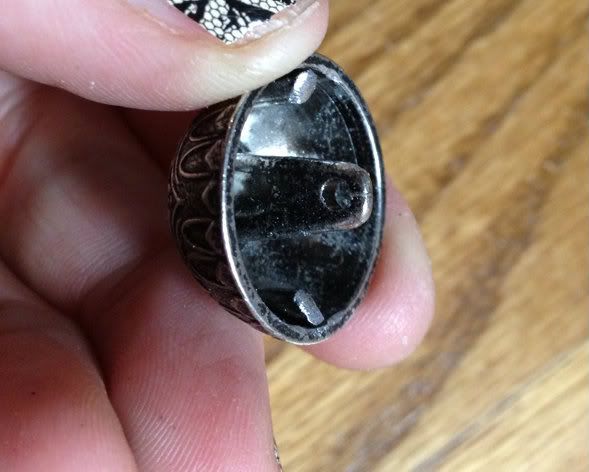
This is my favorite part! You could just hot glue the original plastic finial back in place, but these metal buttons look so much neater. That little tongue-shaped shank...


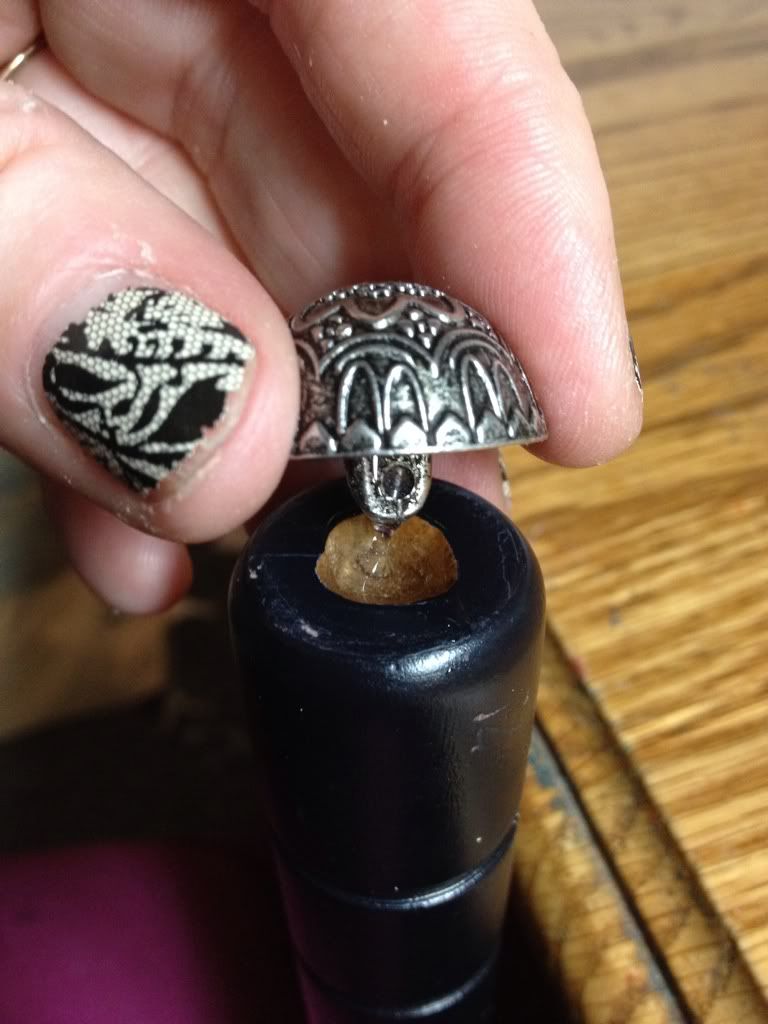
...is going into a slot I'll cut into the top of the handle. Risk=high,  reward also high! I cut a hole in a button packaging card to just fit the handle and use that for a guard so I don't tear into the trim with the coping saw.


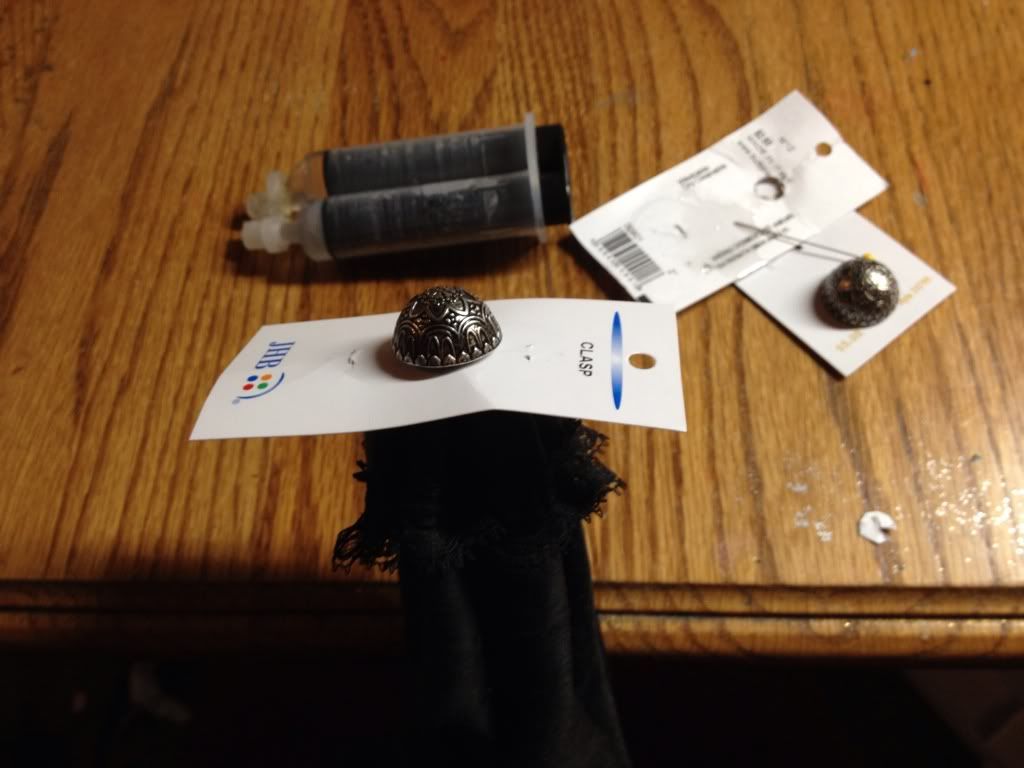
The slot is about as deep as it can go but the button still sits a little high for my taste.


I use my stonking great corset steel boning cutters to gnaw off as much of the shank as I can reach.


I leave the guard in place and apply two part epoxy to the slot. The button sits in nicely now. As the epoxy sets I turn the guard a few times to keep it from getting stuck and then I can just tear it off after the glue sets completely.


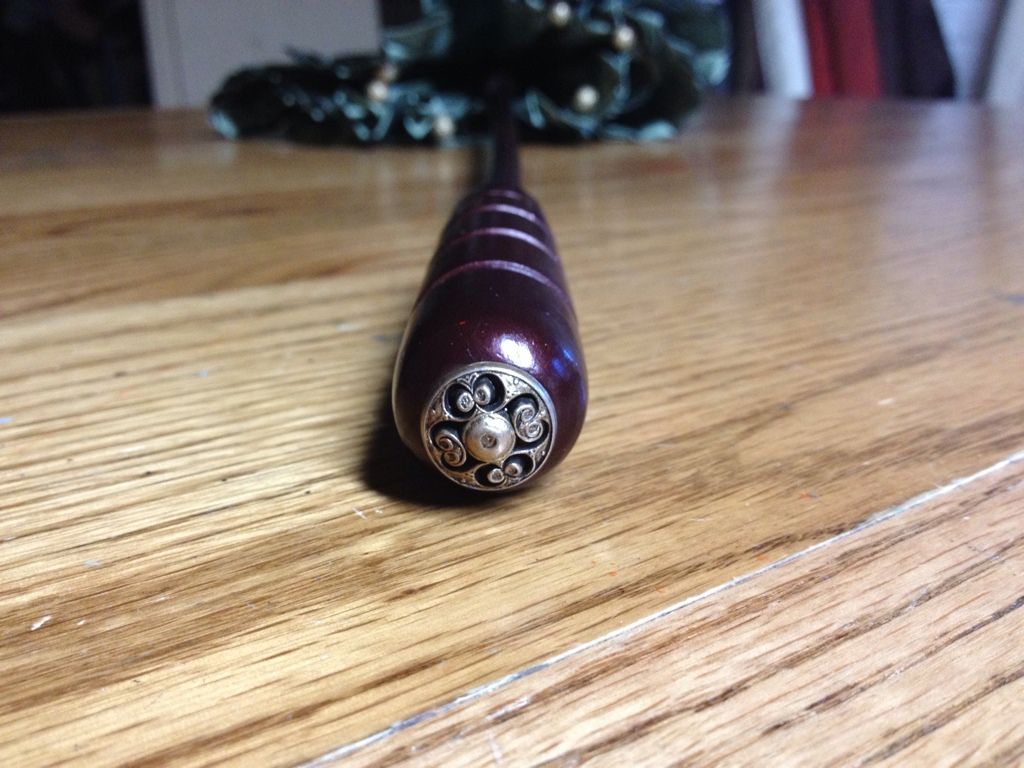
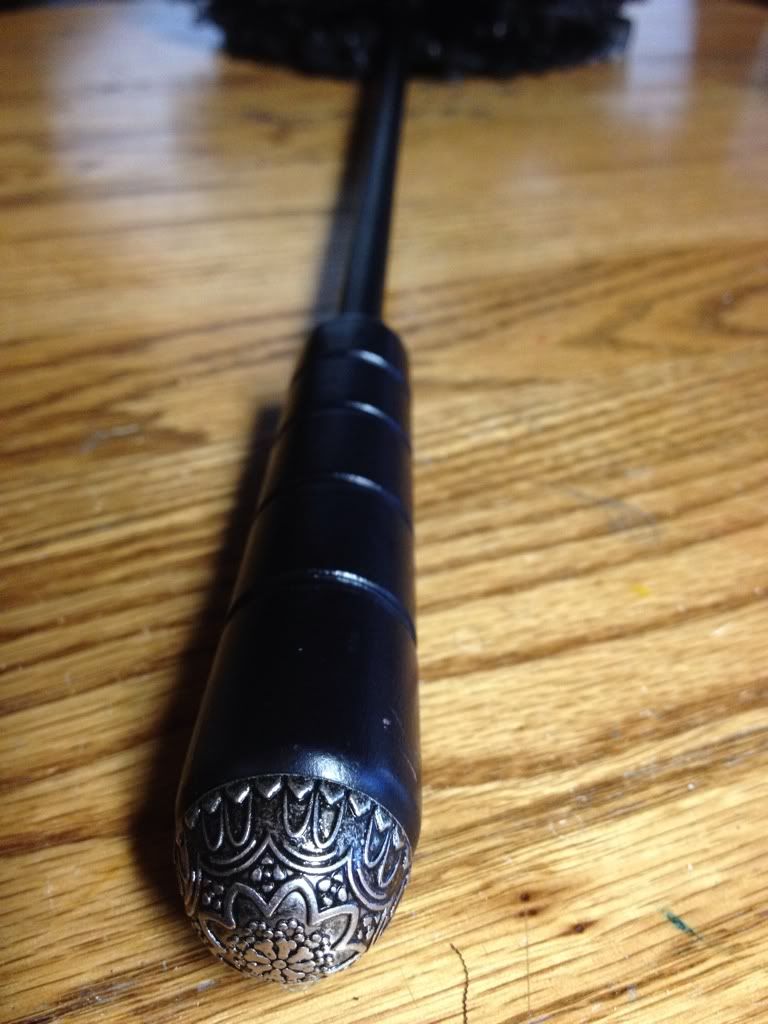
The other button finishes the handle end. I drill out a hole large enough to accommodate the width and length of the button shank.


However, the button has a couple of places inside that interfere with the rounded edge of the handle. I use a dremmel to grind them out of the way.


The hole gets filled with more epoxy and I hold it for a good ten minutes to make sure it stays centered. The Johnny Cash playlist has long since finished and this is a good time to watch a little Netflix. One might think a costume drama would fit the bill, but somehow I landed on Captain America. :D


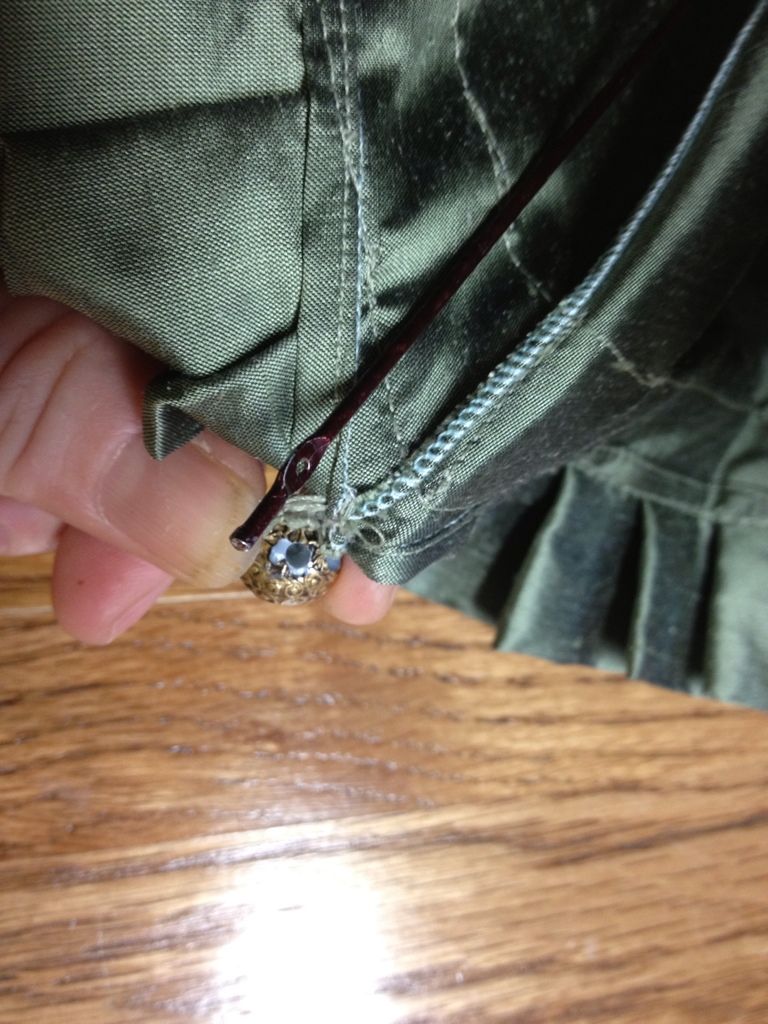
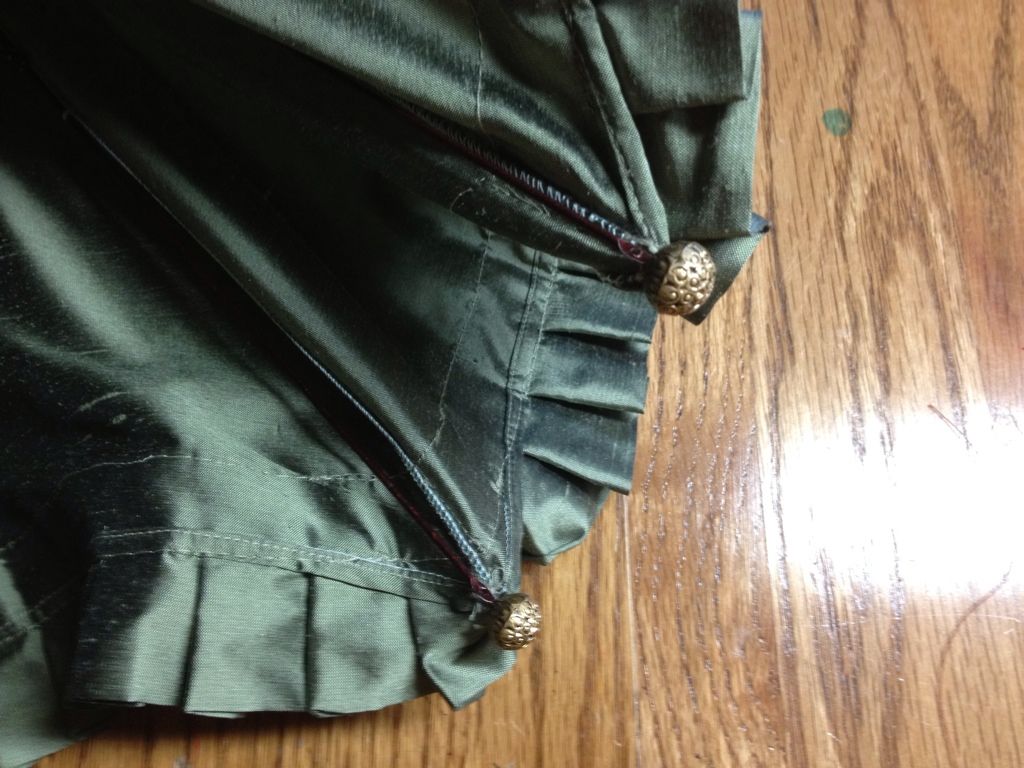
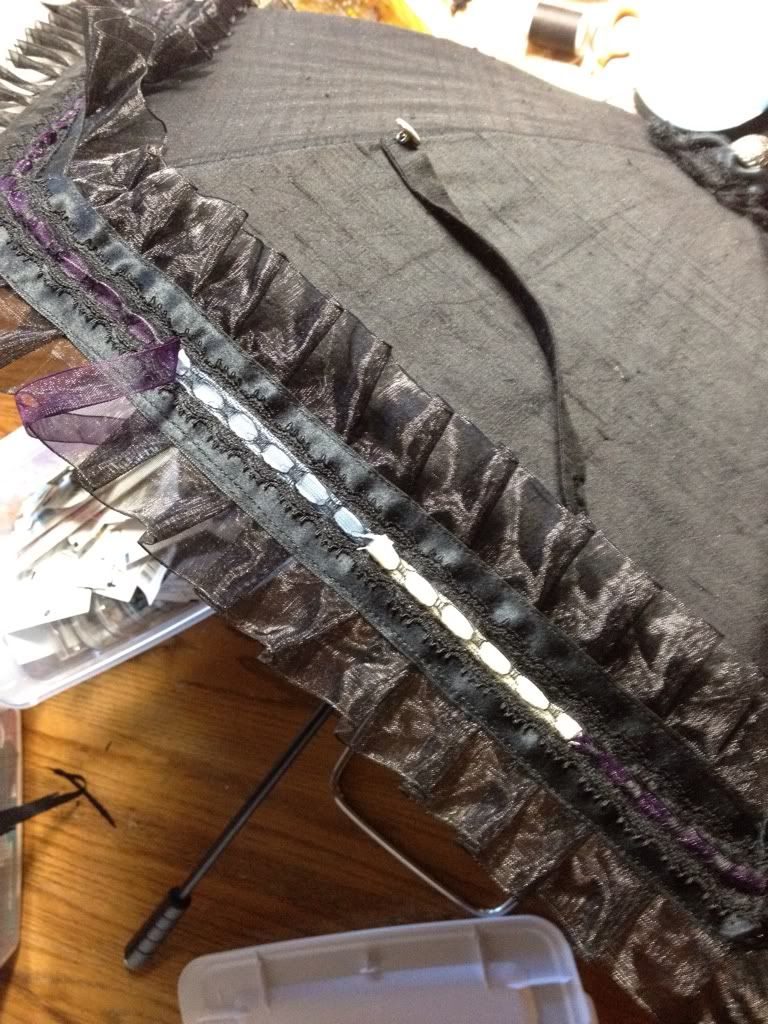
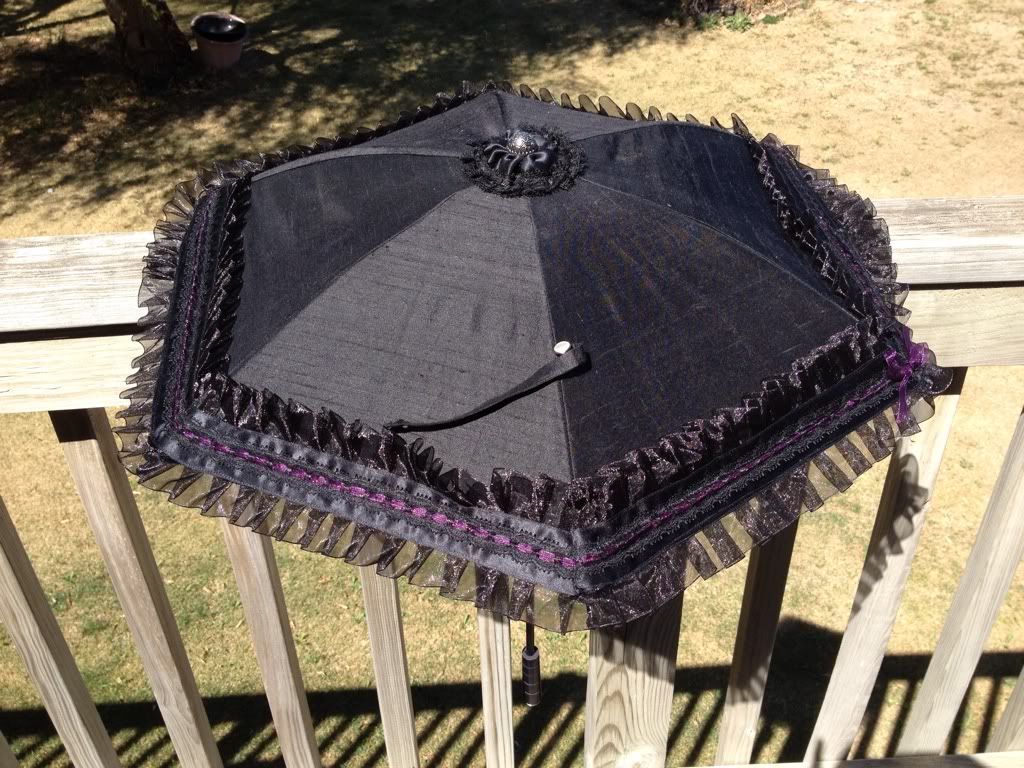
The great thing about the beading lace is that different colors of ribbon can be swapped out to coordinate with different outfits. You can also see here the strap that holds the parasol shut. It's just a scrap of the fabric doubled and sewn into a half inch tube. It gets turned, ends tucked in and a buttonhole. Hand sew it to the parasol and add a matching button. 


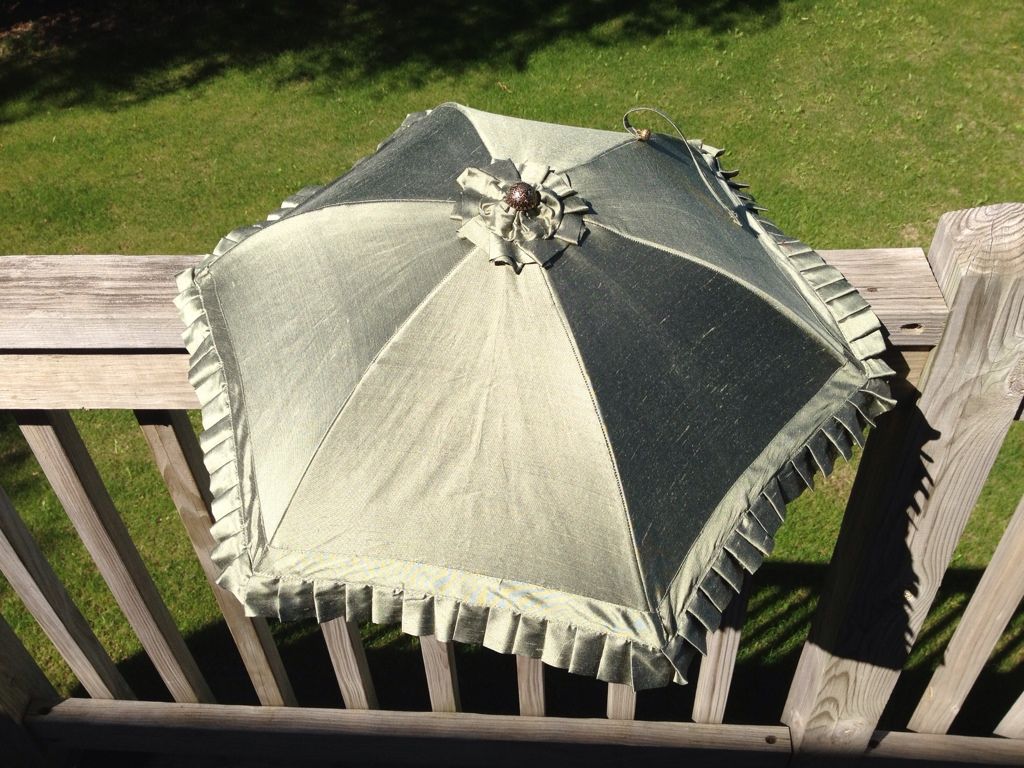
The finished parasol.