The Truly Victorian 1865 Elliptical Cage Crinoline is complete! Huzzah! It's not really a difficult project, and now that I see how it's done, I'm going to try another hoop on my own. We'll need an 1850s dress for our program at some point and the hoops to support that shape are all complete rounds attached to the support tapes in the same way and sized so as to make a domed shape.
Here you can already see the shape has shifted from a dome with the body in the center, to the mass of the skirt shifted to the back. Not unlike the bustles that will arrive just a few years later, in this 1865 style the bones behind the hips have ties behind the bum that force the cage to swing to the back.

The last step on this cage was to close the four boning channels in the front.

It's hard to see but I used sort of a bar tack above and below the bone and a long diagonal stitch across the raw edge of the bone casing.

************
Petticoat for the Elliptical Cage Crinoline
The bones of the cage are quite hard and a skirt worn over them would have unattractive ridges, so the next step is a petticoat. The petticoats that the cage crinoline made obsolete were numerous and starched to high heaven. The cage made it possible to have the big skirt shape with more comfort and less work.
The petticoat doesn't need to be stiff anymore, but I like a little fluff in the underlayers, so I'm doing multiple tiers of ruffles. I had intended to use plain soft muslin for the petti, but just before I went to buy fabric I happened in my web browsings across a lovely petticoat with every ruffle edged in embroidery. Suffering from the painful condition Acute Petticoat Envy, I set out to Hancock Fabrics.
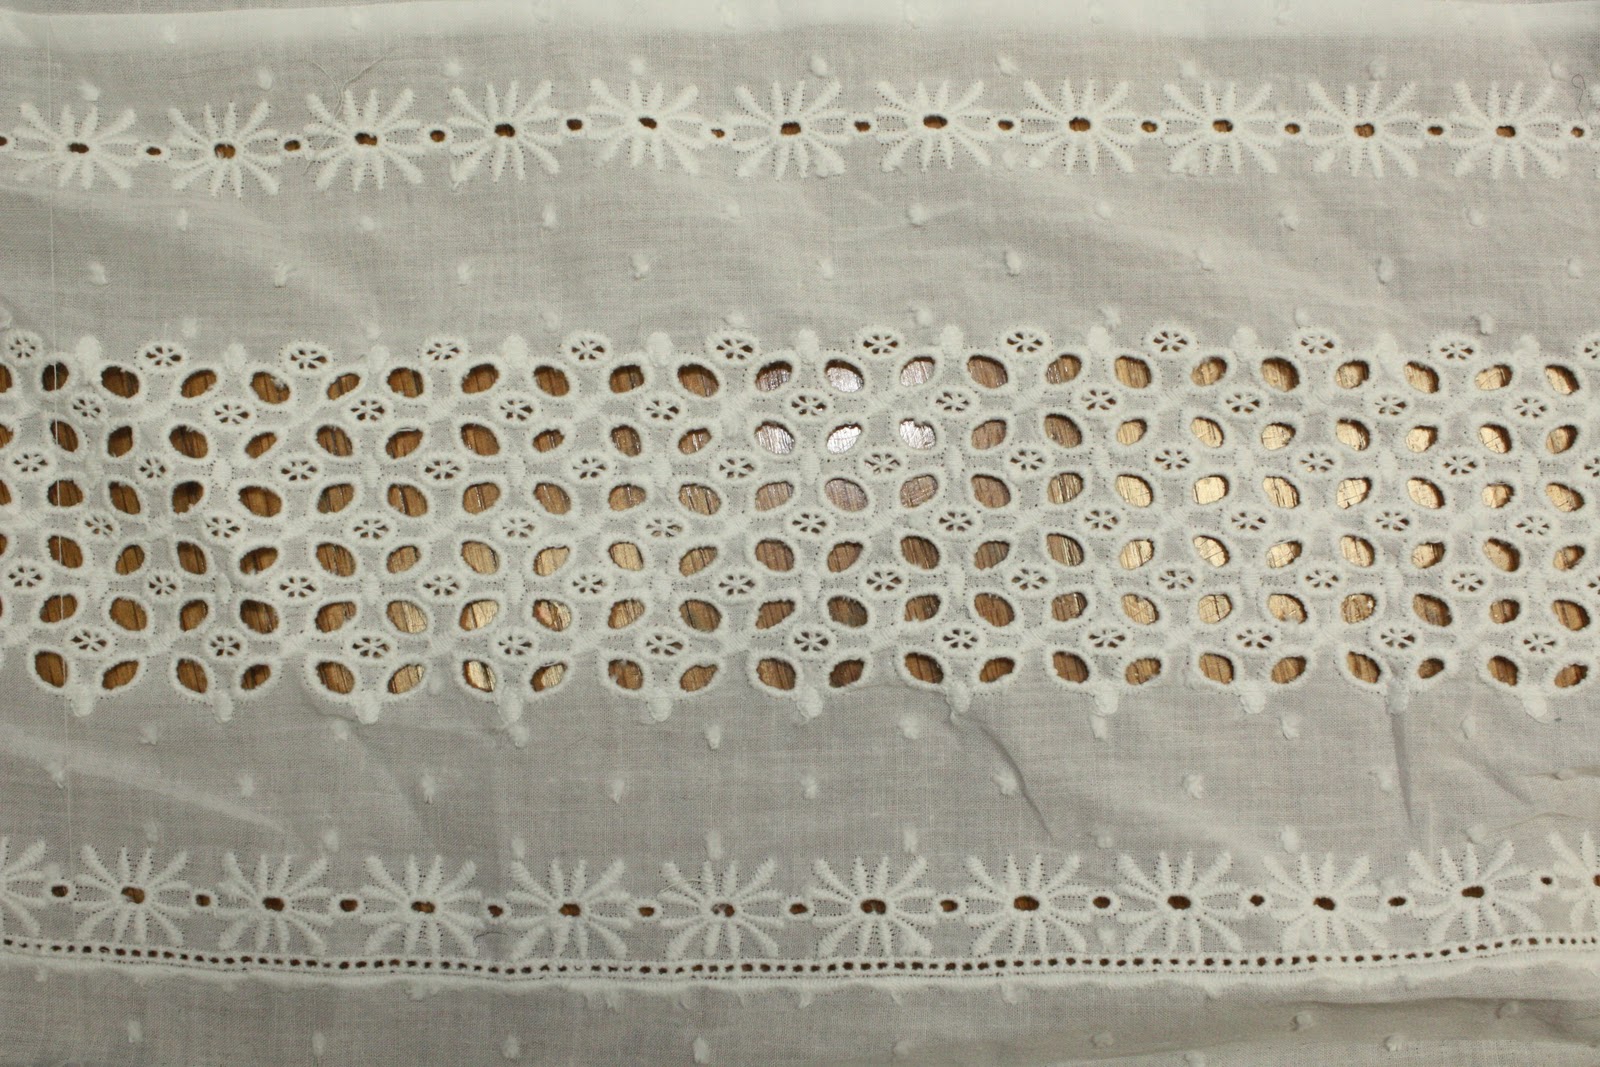
Look what was waiting for me!

Cotton dotted swiss with this amazing eight inch border, in the best machine eyelet I've seen in a long time. It's like broderie anglaise, ever so pretty, and a very effective palliative for Acute Petticoat Envy.
I bought ten yards of this. Any guesses on how long this would take to do by hand, oldschool?
When I have a chance to be historically correct I like to use historically accurate sewing patterns and techniques. Since I'm already starting with historically inaccurate machined trim, I'm going to use a construction technique I've developed called "wingin' it". *grin* I'll also use my serger for finishing seam allowances and for rolled edges on the ruffles. Too many minutes of straight stitching on long hems has been known to cause catatonia.
I stripped off the border for the bottom ruffle and put that aside. I used a length of the fabric to form a yoke so as to drop the fullness of the petti down from the waistline to keep the line at the waist nice and trim. A double fold hem forms a drawstring casing.

Knowing I had lots of ruffles in my future, I recently invested in a ruffler foot. Where have you been all my life?! I haven't been able to figure what the settings mean, and I've only stumbled into one setting that works well, but boy does it work in that setting. I'm in love.


Good bye sweeting, I have to go talk about petticoats some more, but I'll be back soon!
So, petticoats are pretty straighforward. One way is to mount the ruffles on a base skirt. I hate that way. I decided to use long strips of base muslin slightly gathered at the top, baste a ruffle of the dotted swiss to the muslin, and then sew that whole assembly, right side to right side, to the muslin layer above it. This works brilliantly on round skirts, but this skirt isn't round. To compensate for the extra length needed to cover the back of the hoop I added a small strip of extra muslin at the center back of muslin base rows one and two, and ended it at the sides.
The strip is sewn in place,

Folded to match the ends,

And then trimmed to gradually return the ruffle to the shorter side and front.

Two tiers completed. You can see the added strip at the back.


The completed petticoat!

This is the bottom edge after the selvedge edge has been trimmed away from the embroidery.

I've only trimmed about yard. I'm going to take this down to Ste. Gen and get up a party to help trim the remaining nine yards. Guess who's invited Stephanie? *grin* Lu can come too.


