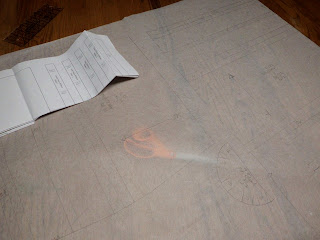
The pattern I'm using is by Truly Victorian:
The elliptical hoop pattern is given in one size, so I could have just cut the pattern, but I don't care for the way the heavy paper pins to fabric so I traced it off on pattern copy textile. I love this stuff! It pins easily, and drapes nicely for pin fitting when doing garments.
You can see how sheer it is. Truly Victorian patterns are drawn with nice dark lines that make it easy to see through the copy fabric. So, pattern pieces are copied:
And fabric is cut. One thing I've learned from making bustles is mark well. I like to fly (sew?) by the seat of my pants sometimes, but the fairly rigid architecture of hoop boned undergarments doesn't allow much leeway in the boning channels. So, no matter how boring, Marks! I use a water activated disappearing ink pen.
The Truly Victorian pattern is just four pattern pieces to cut, with marking diagrams for the ribbon supports and boning channels. The fabric, called the 'bag', encases the lowest four hoops. This is to stop the wearer from accidentally putting a foot through the hoops.

The pattern calls for belt webbing, but I couldn't find anything that wasn't stiff and really heavy, so I went with the same grosgrain ribbon as the bone channel supports. I didn't have a proper buckle in my stash, so a vest buckle will do for now, with a pin to secure.
The support ribbons all attach to the waistband. Five are managed by the crescent shape at the small of the back and two hang from the front waistband. Looks like the attack of the grosgrain octopus.
The ribbons are attached to the bag which already has its hoopwire installed. This is starting to look like a proper contraption!
The rest of the hoop bones are cut and ready to position on the support ribbons.
The pattern says to pin the hoops in place and check the balance, and then sew the hoops to the ribbons by hand. I've been practicing a brutal (for me anyway) piece of classical Spanish guitar music pretty obsessively for the last week and a half, and my left hand is just shot. If I couldn't use the machine, the hoops weren't getting done any time soon. I found that the hoop casings could be sewn under my zipper foot...
So now we're wrastlin', the hoops and I. :D
Stay tuned, more to come!


